How can we help you?
Start and hold a meeting
With Beenote, you can start a meeting that you have already planned but also write a quick agenda for unexpected meetings. Find out how to make the most of our features for your meetings.
What you will find in this article:
Start a Meeting already Planned
To start a meeting that is already scheduled, you must of course have already created your agenda.
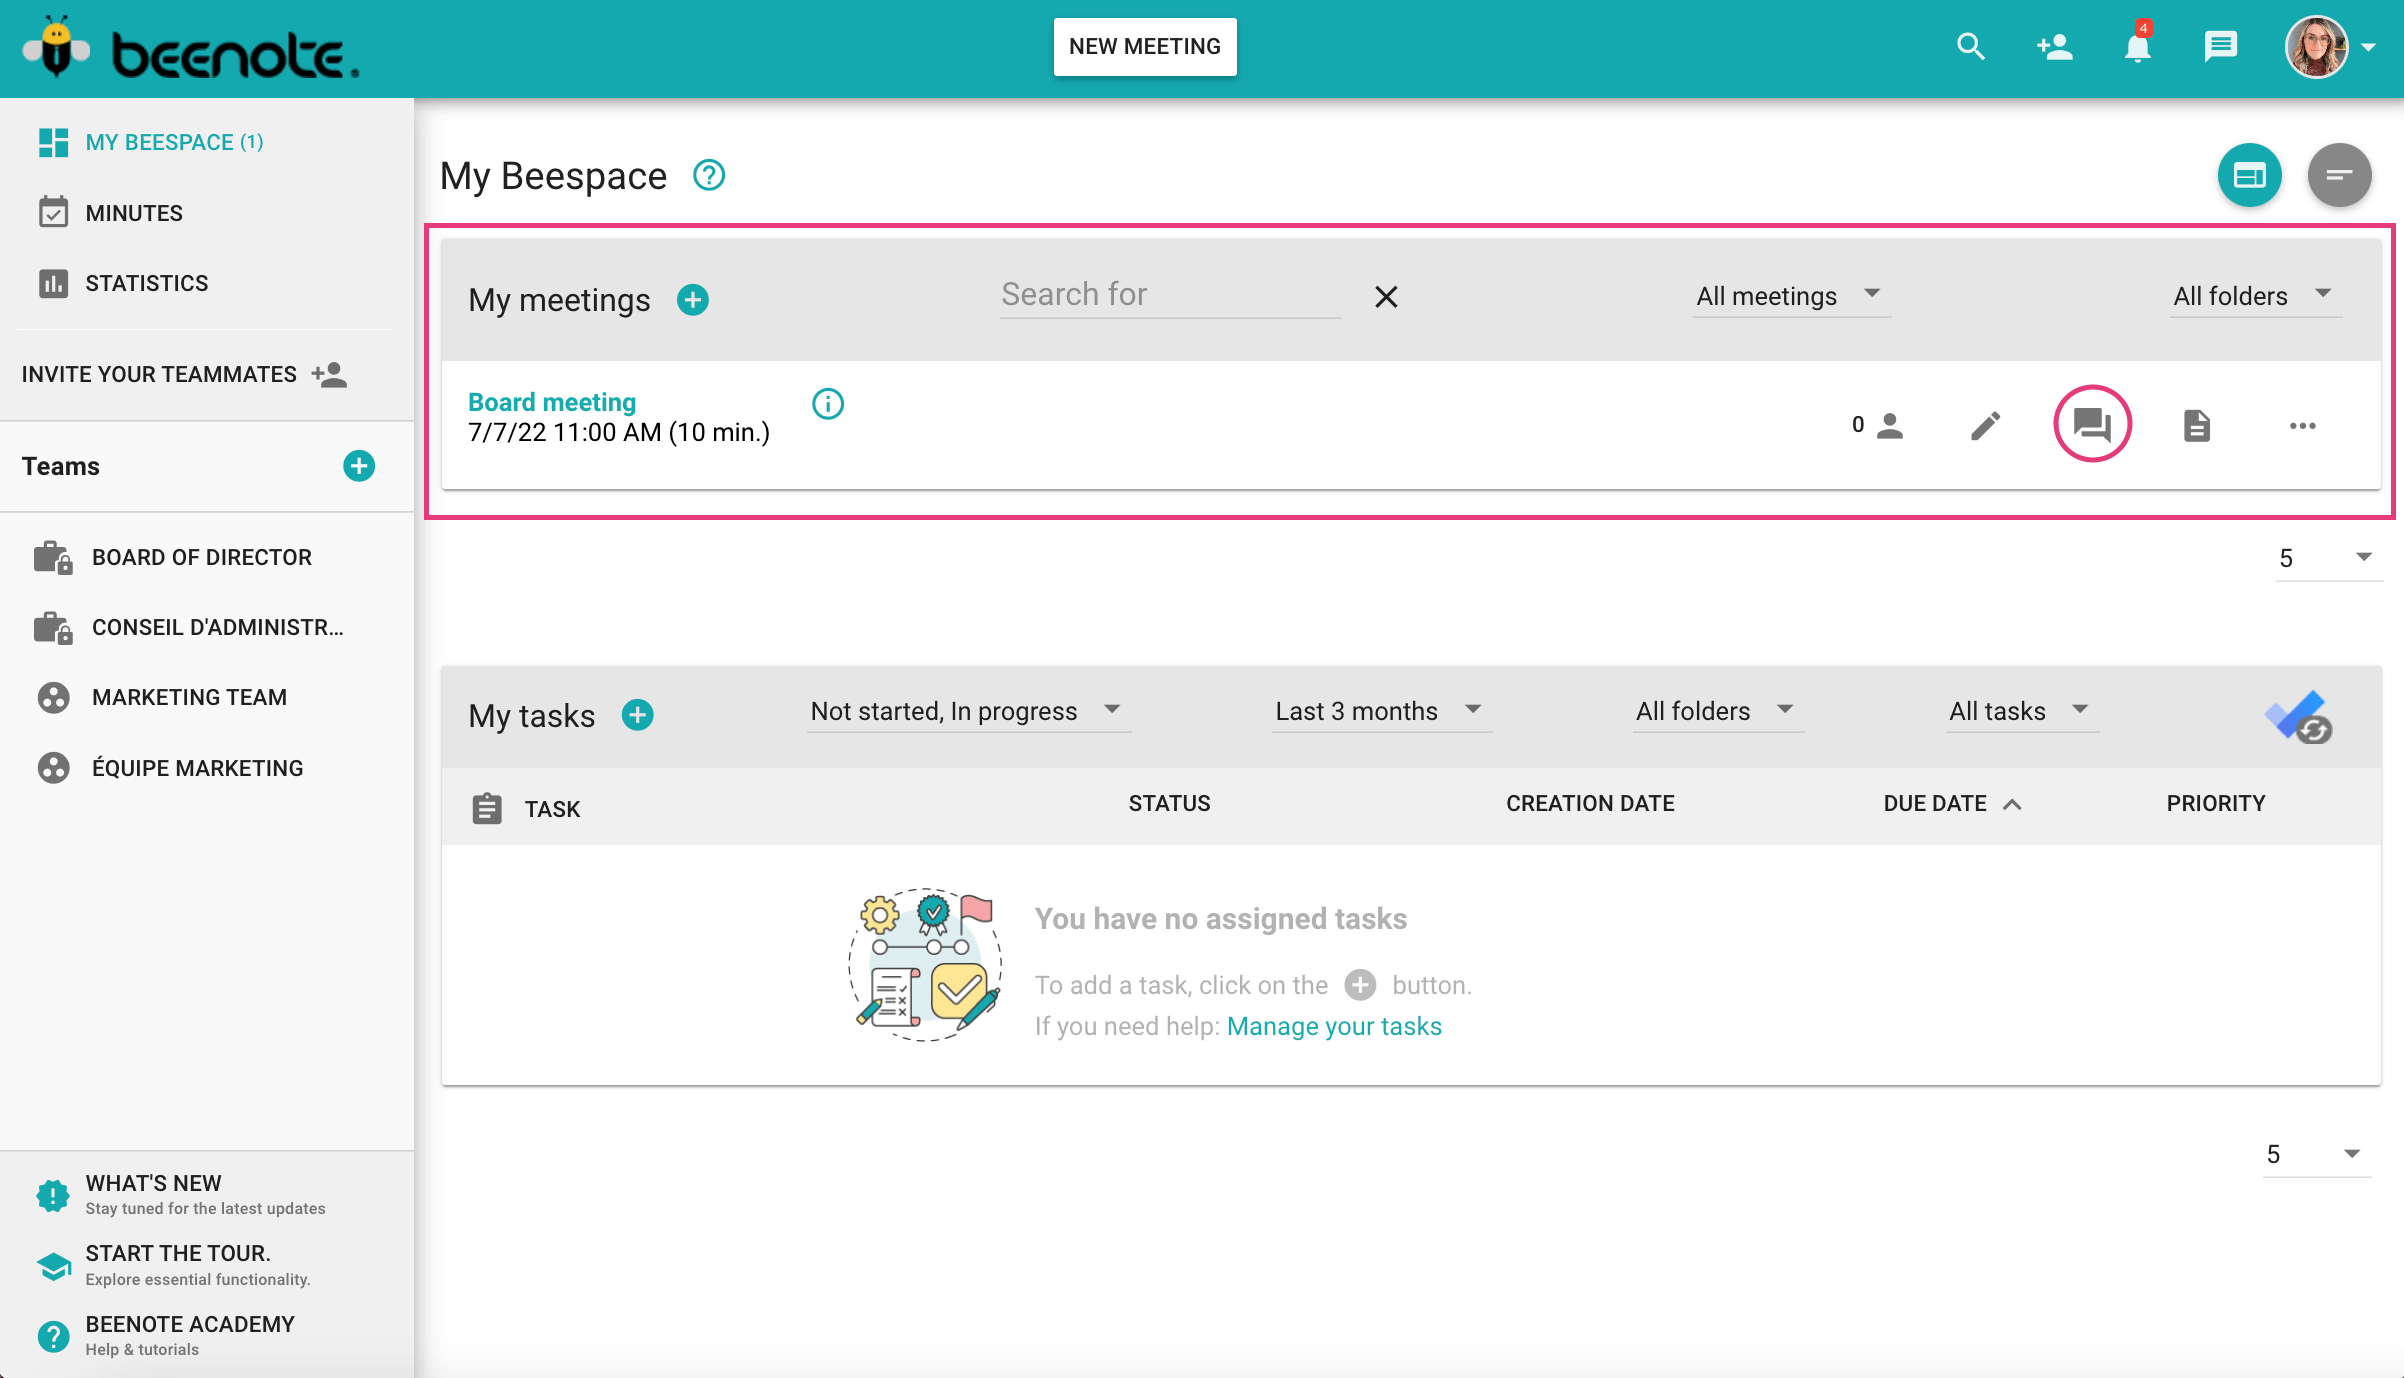
1. You must be in the My Meetings section of your Beespace.
2. Locate the desired meeting and click on the meeting name or press this button![]() to open the meeting.
to open the meeting.
You will be directed to a preview of the agenda before the meeting begins.
3. Click on ![]() , then a small window will open to confirm your intention to start the meeting. Click on Start Meeting.
, then a small window will open to confirm your intention to start the meeting. Click on Start Meeting.
Start a Quick Meeting
You can start an unscheduled meeting with a quick agenda.
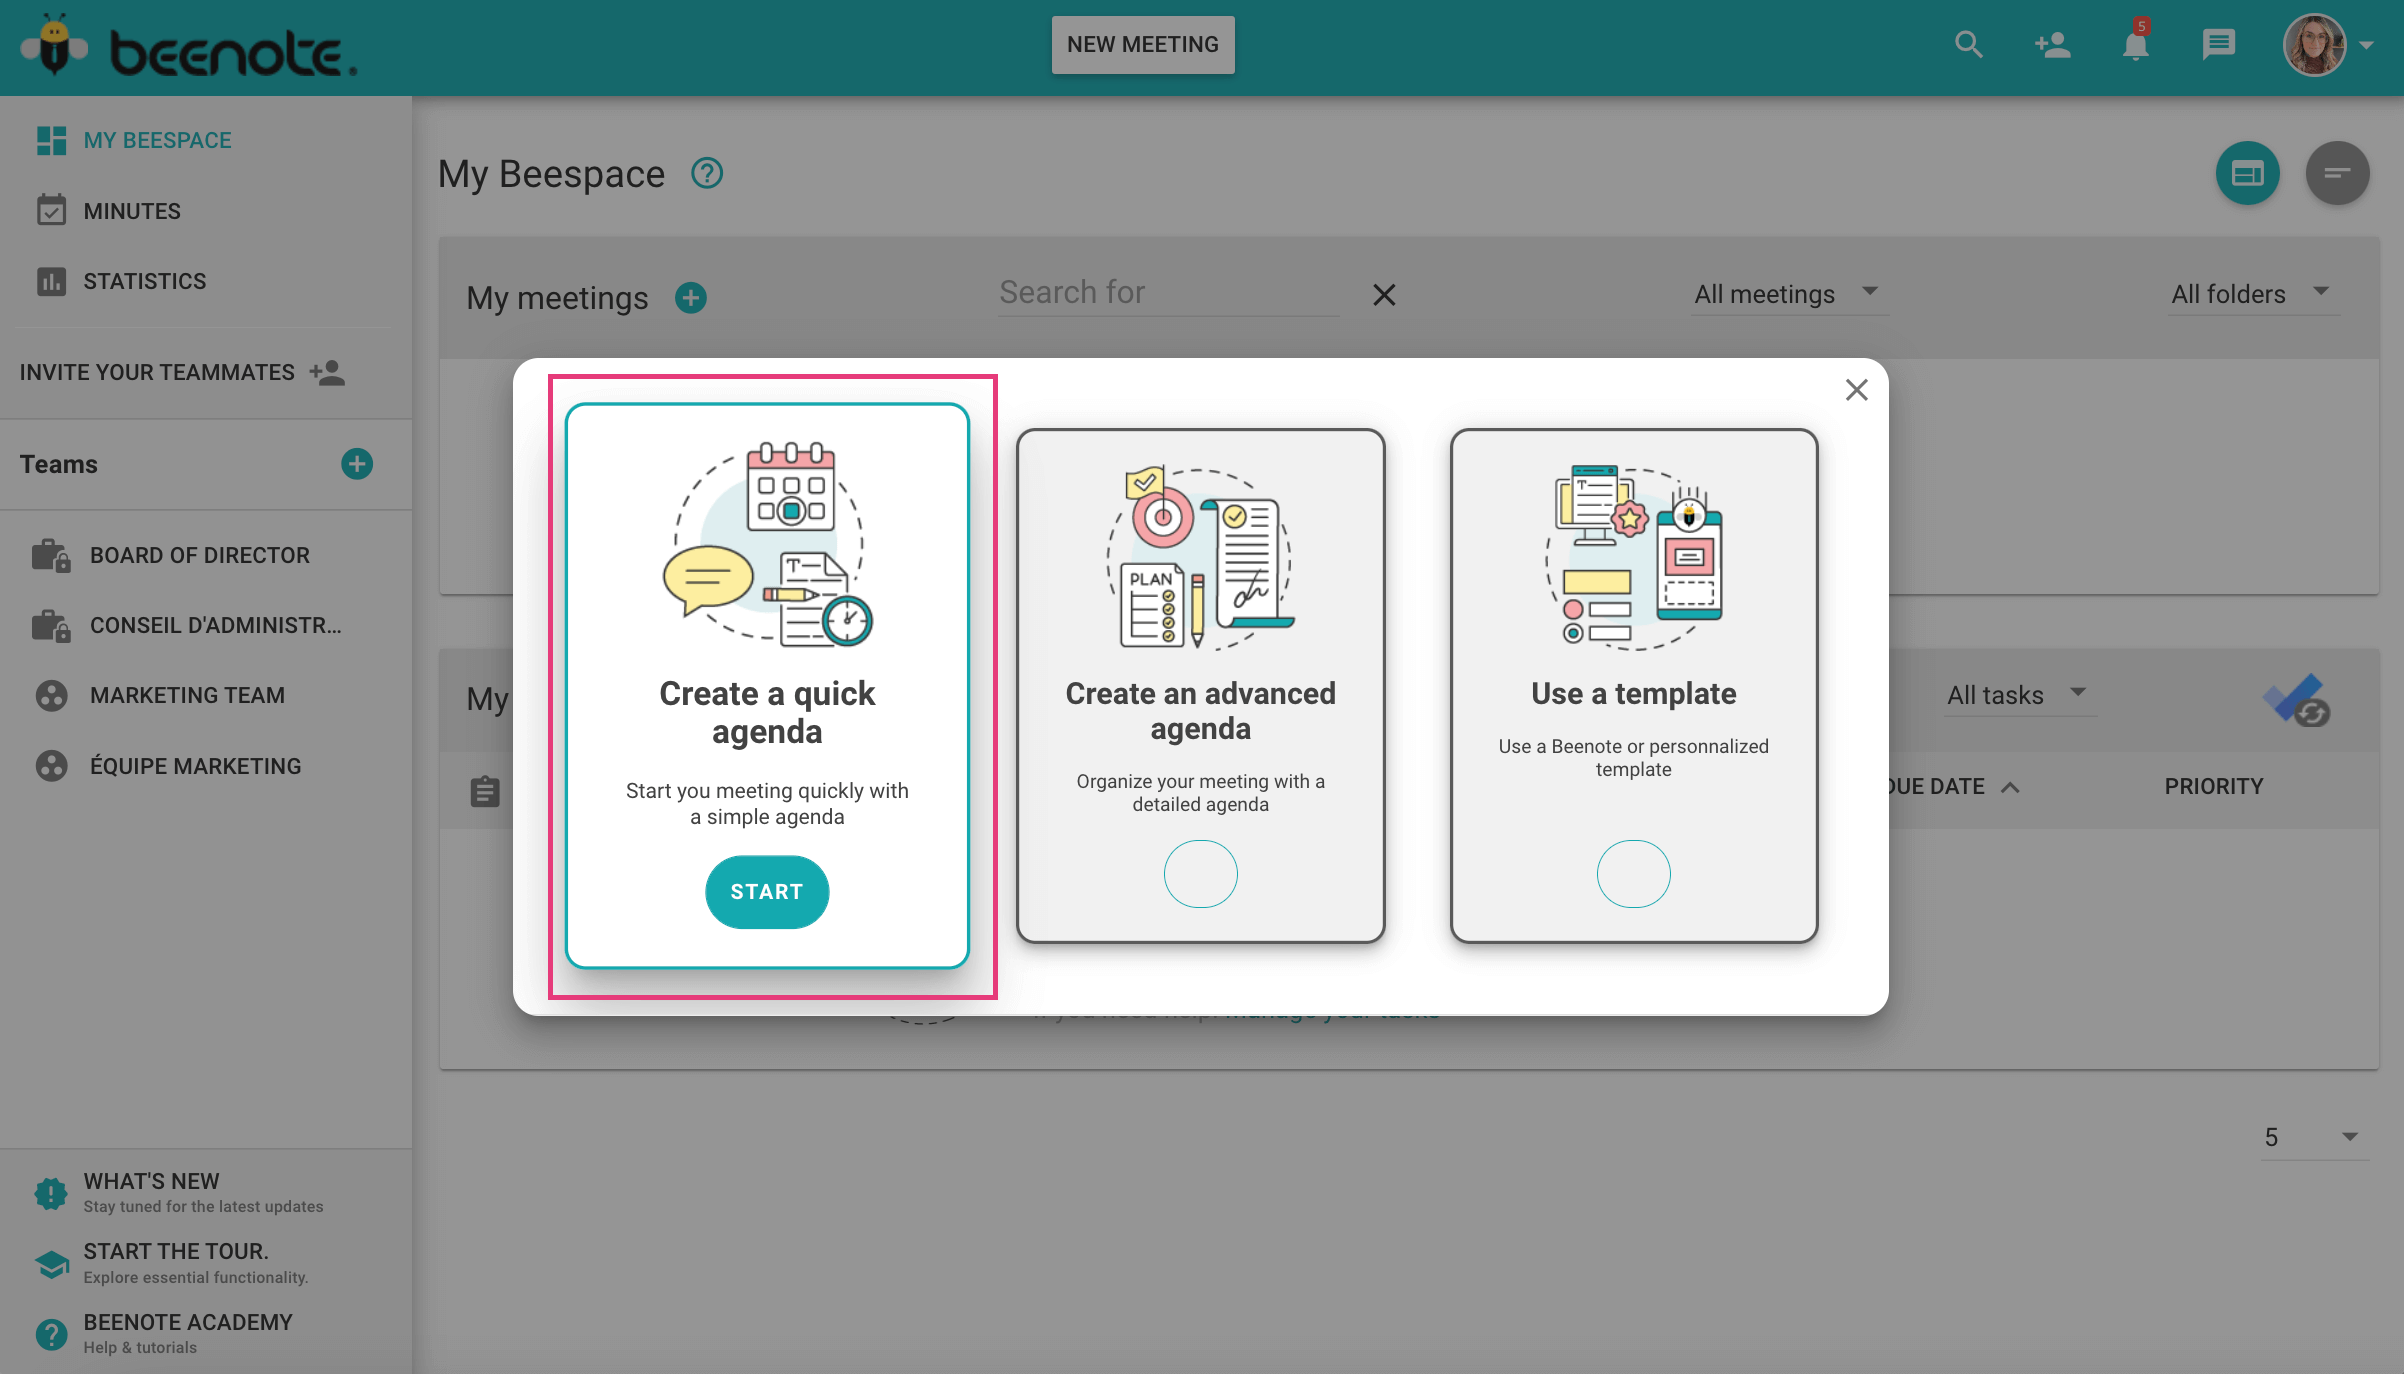
1. In your Beespace, click New Meeting.
2. In the new window you will see the 3 choices for creating a meeting. To create a meeting quickly, choose to Write a quick agenda.
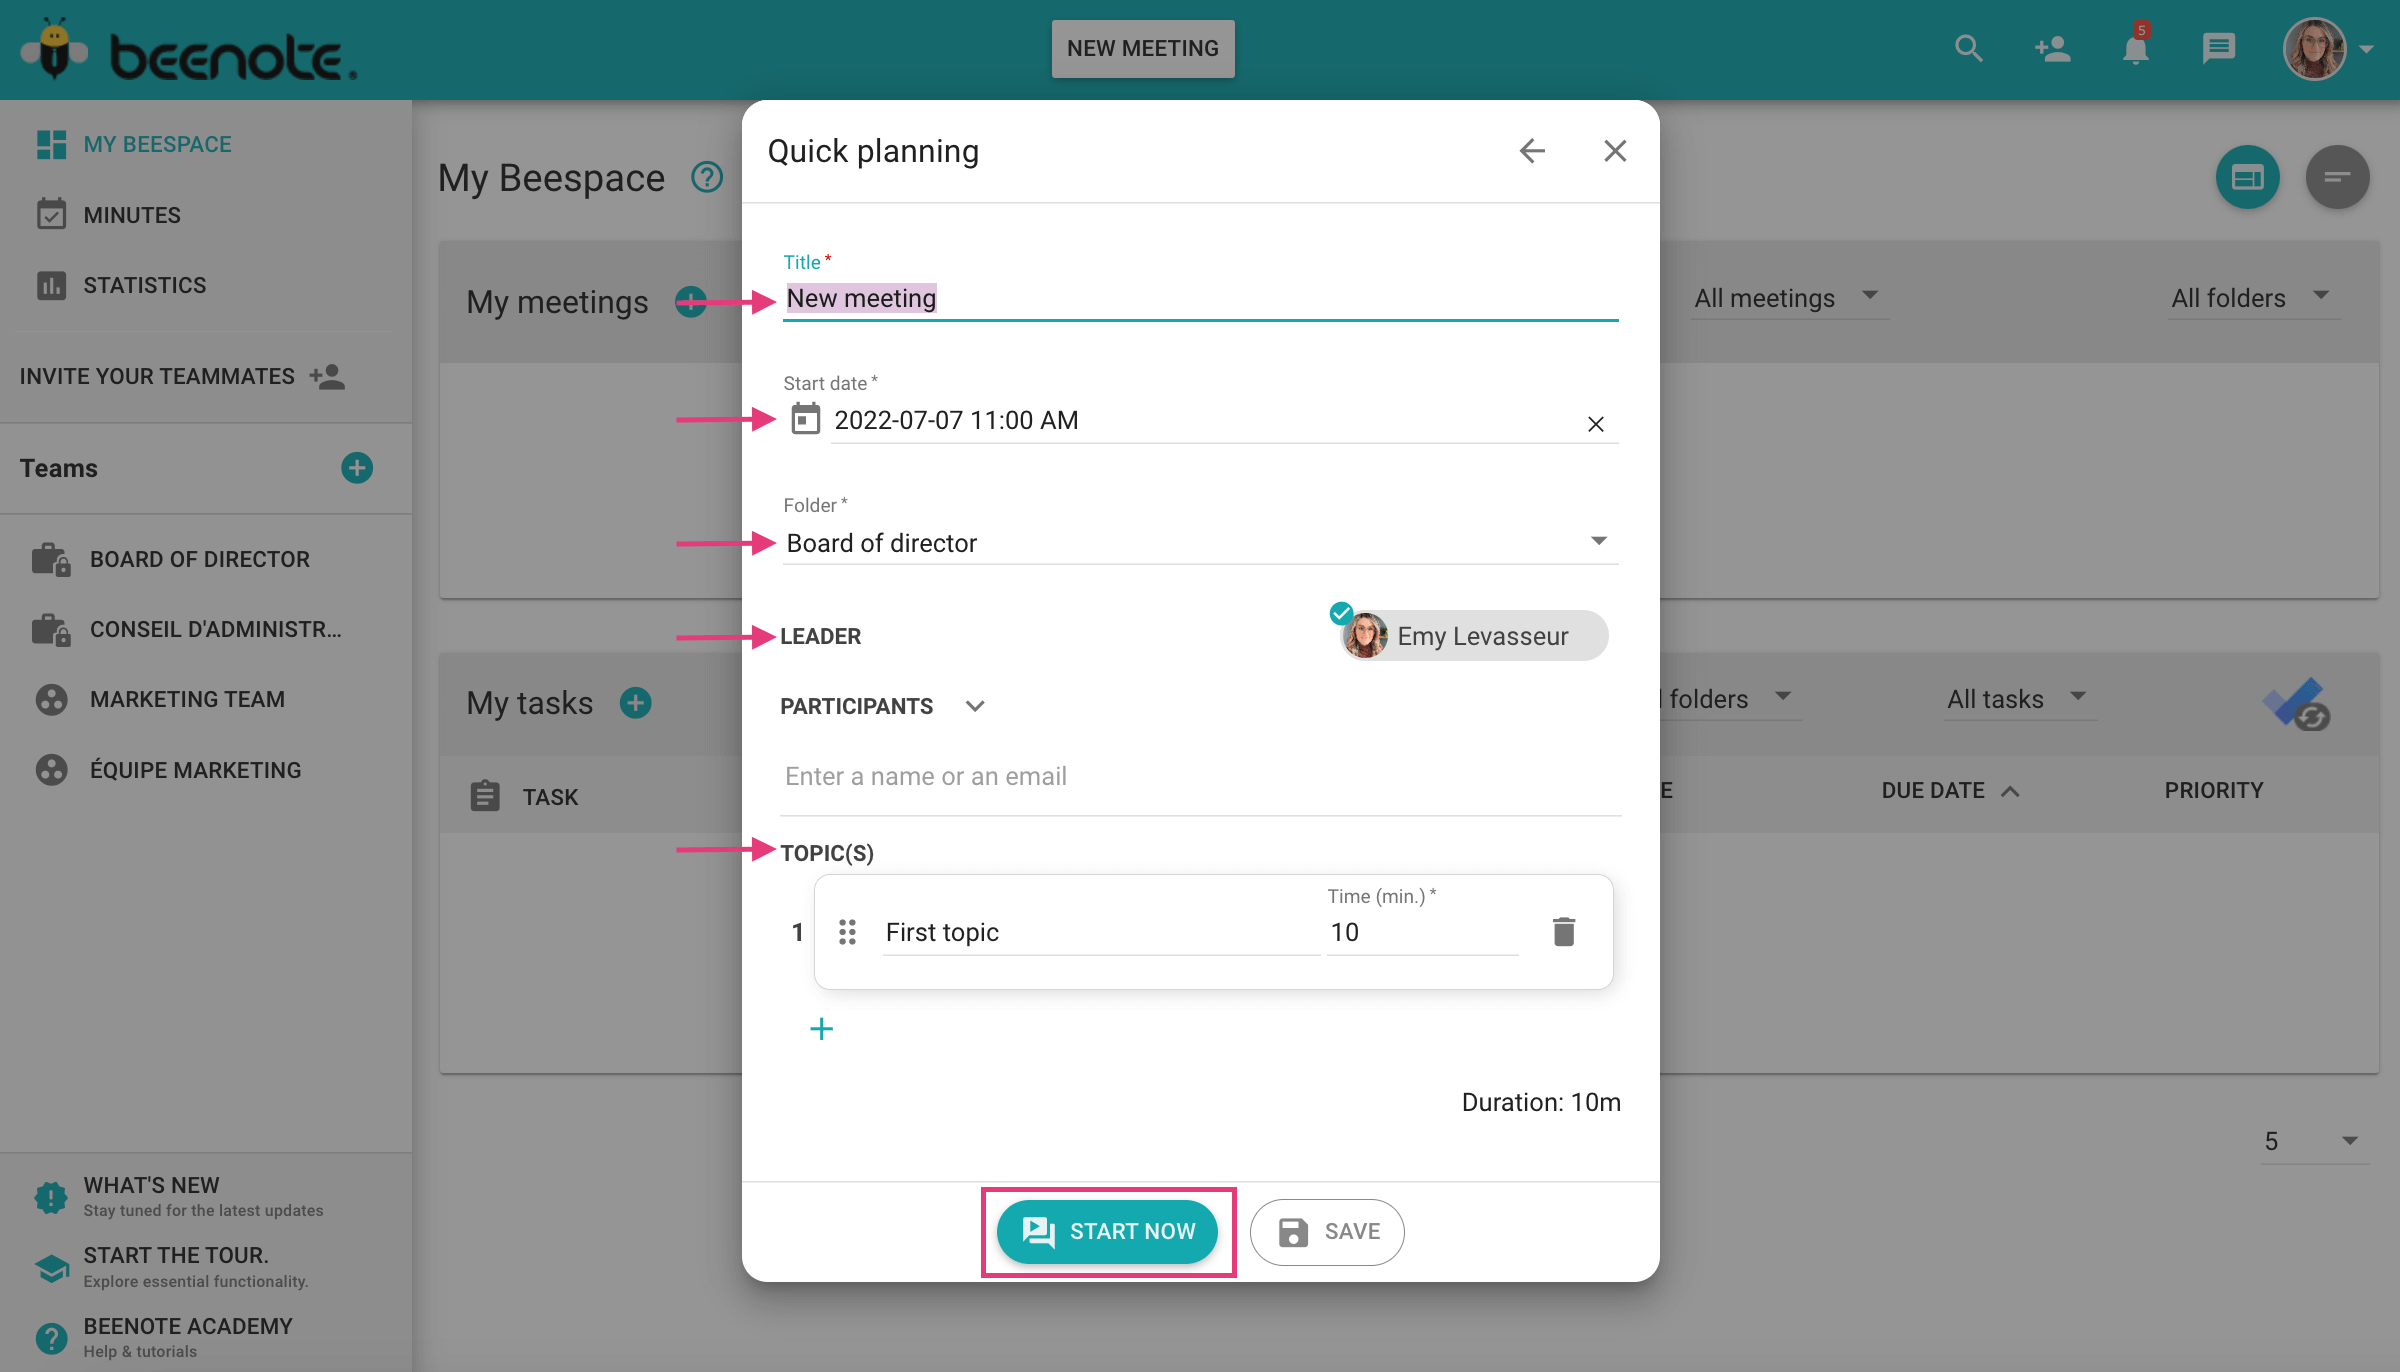
3. Another window will appear for minimal planning. Enter the 5 basic information needed:
- The title of the meeting
- Date and time
- The file (the team)
- The Leader (the creator of the agenda) and the participants
- Topics to be covered and their approximate duration
4. Finally, click on Start Now to start the meeting or Save if you do not want to start it right now.
Note: You will find that this method of writing is very simplified and less optimal than a full agenda writing. We recommend that you use the quick mode for more spontaneous meetings.
Hold a Meeting
Your meeting is now underway. Now, what do you need to do to run your meeting properly?
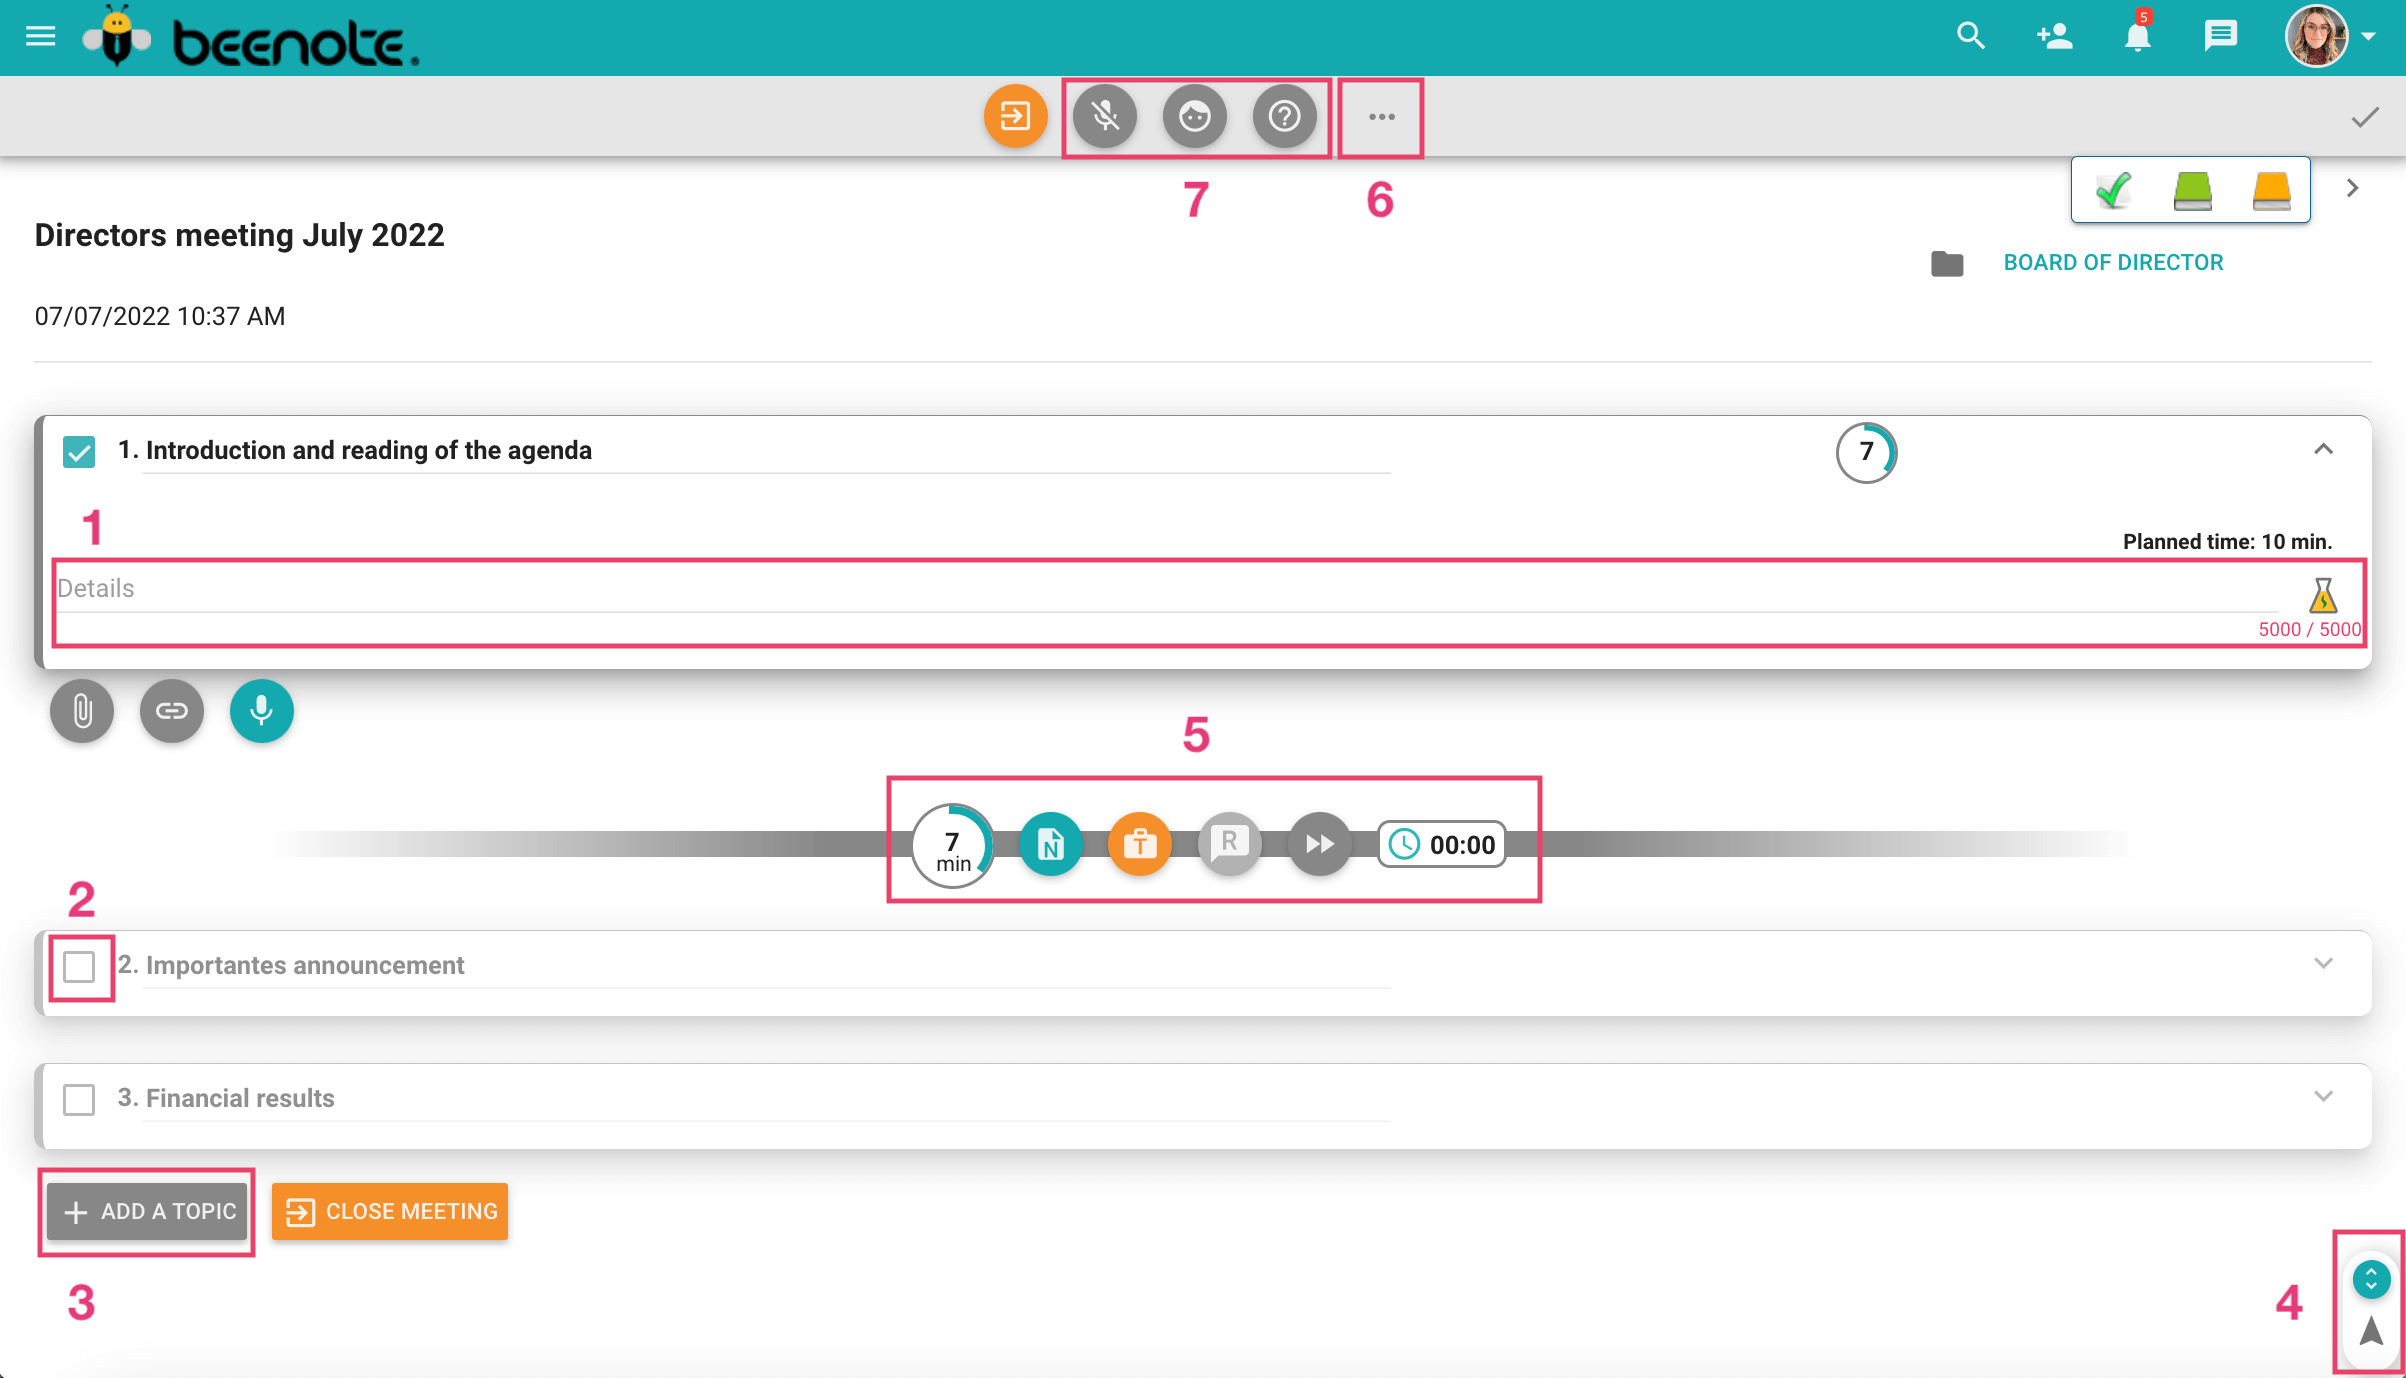
Here are the important features to manage your meeting:
(1) During your discussion, write down the details of the topics on the agenda.
You can add links, attachments, or a voice recording with the buttons: ![]()
![]() .
.
(2) To move on to the next topic, click on the box of the next topic ![]() or with this icon
or with this icon ![]() in the toolbar.
in the toolbar.
Important: if you want to skip a topic, you must keep the box of the unchecked topic so that it does not appear in the minutes. You can include it again when you finalize your minutes.
(3) To add a topic at any time.
(4) To follow the topics in real-time without having to follow the current topics with your mouse, you must have the auto-scroll icon enabled ![]() or you can keep it disabled
or you can keep it disabled![]() .
.
(5) The functions of the toolbar:

The first icon serves as a chronometer to see how much time is left or exceeded for your subject.
The icon ![]() is used to add a note to your topics. You can add a title, details, links, and attachments. In addition, you can add sub-notes by moving them with the arrows at the bottom right.
is used to add a note to your topics. You can add a title, details, links, and attachments. In addition, you can add sub-notes by moving them with the arrows at the bottom right.
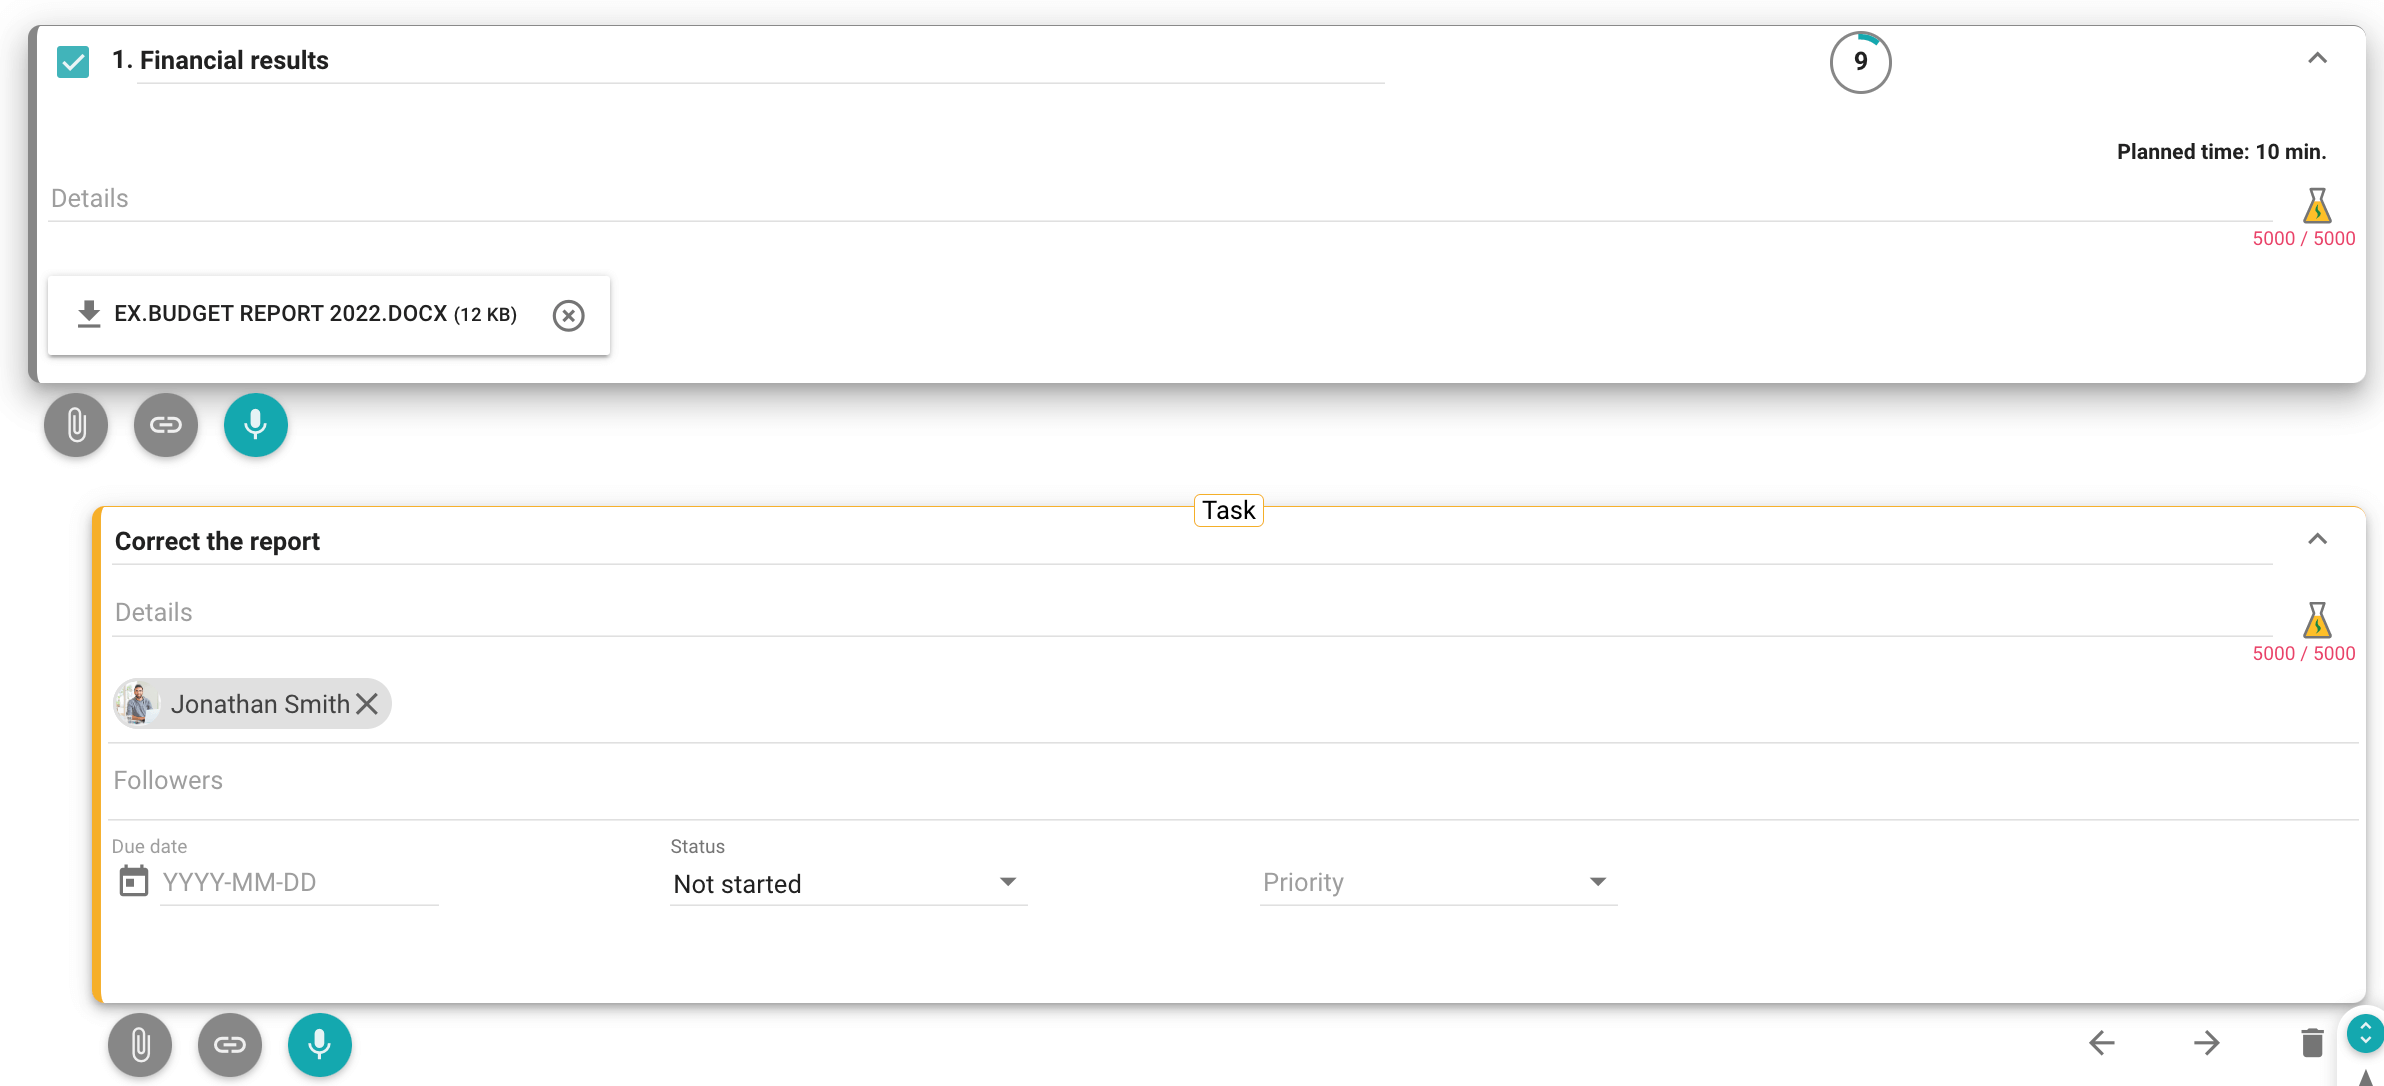
This icon ![]() is used to assign a task.
is used to assign a task.
To learn more: see our Assign and track tasks in meetings page.
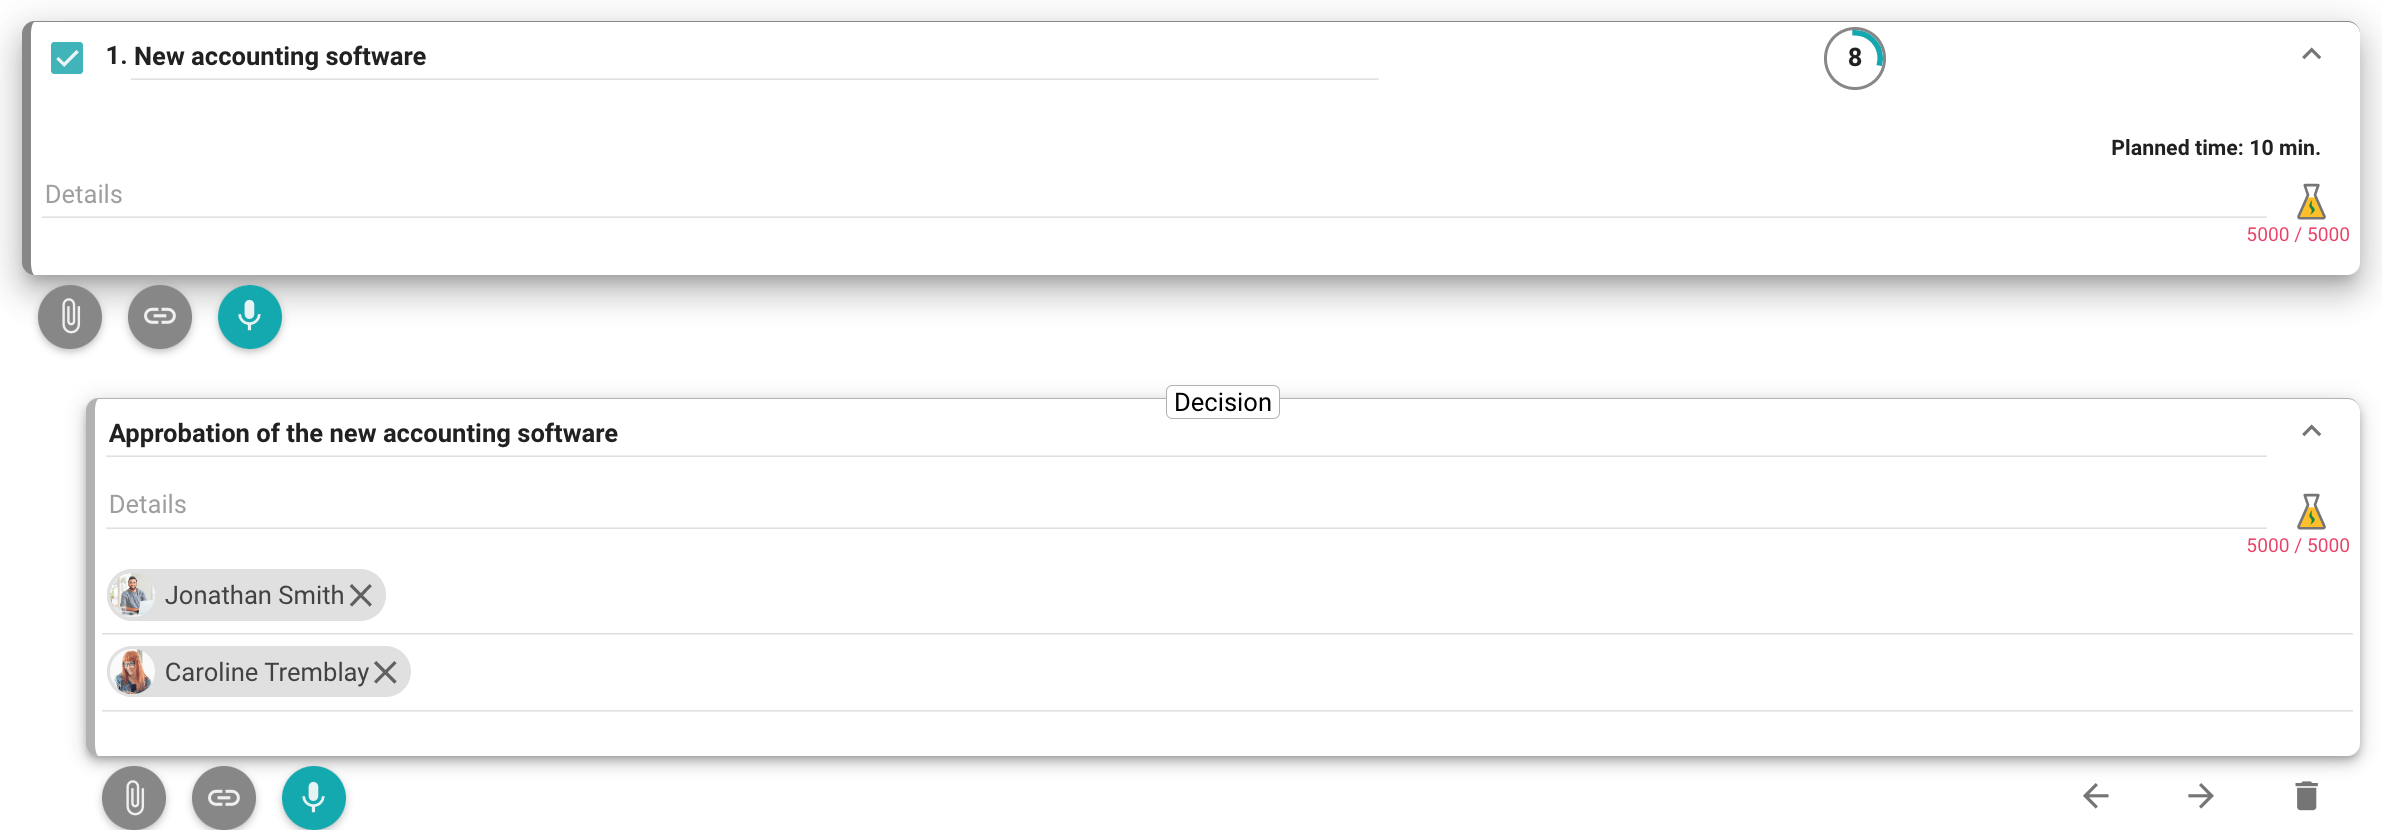
This icon ![]() serve to add a decision. Add the title, details, proposer, and second proposer of this decision.
serve to add a decision. Add the title, details, proposer, and second proposer of this decision.
If you are using Beeboard, you have a Resolution icon ![]() rather than a Decision icon.
rather than a Decision icon.

Resolutions are used for more complete and formal decision making including the option to create a vote.
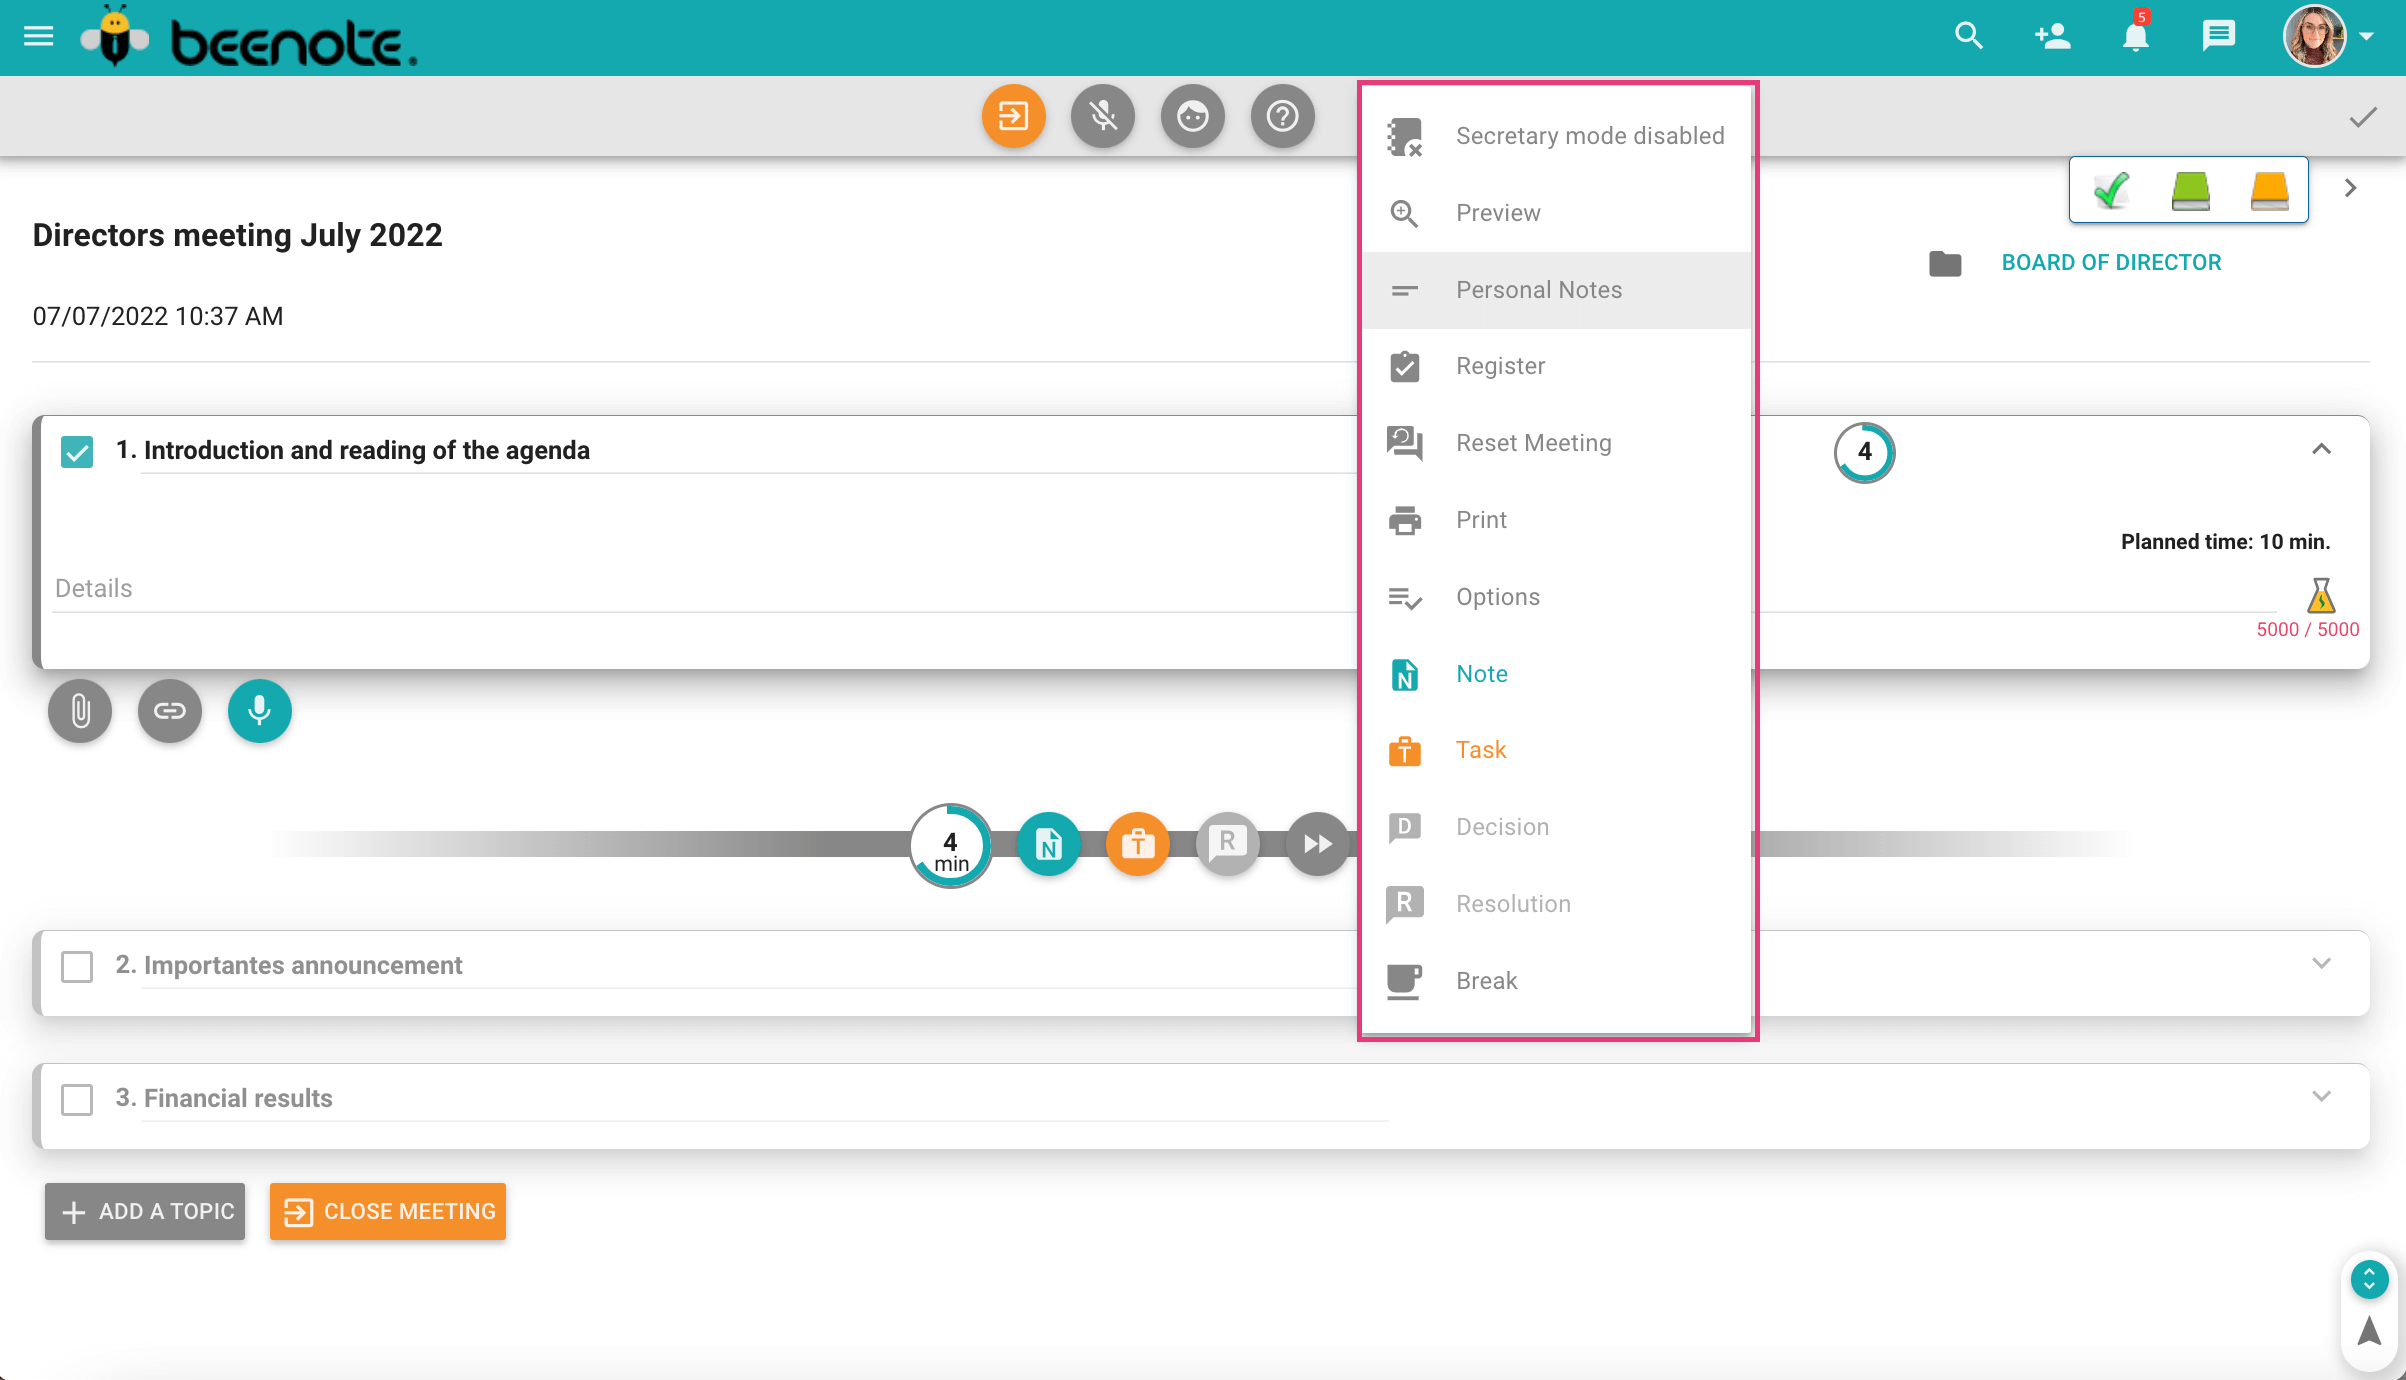
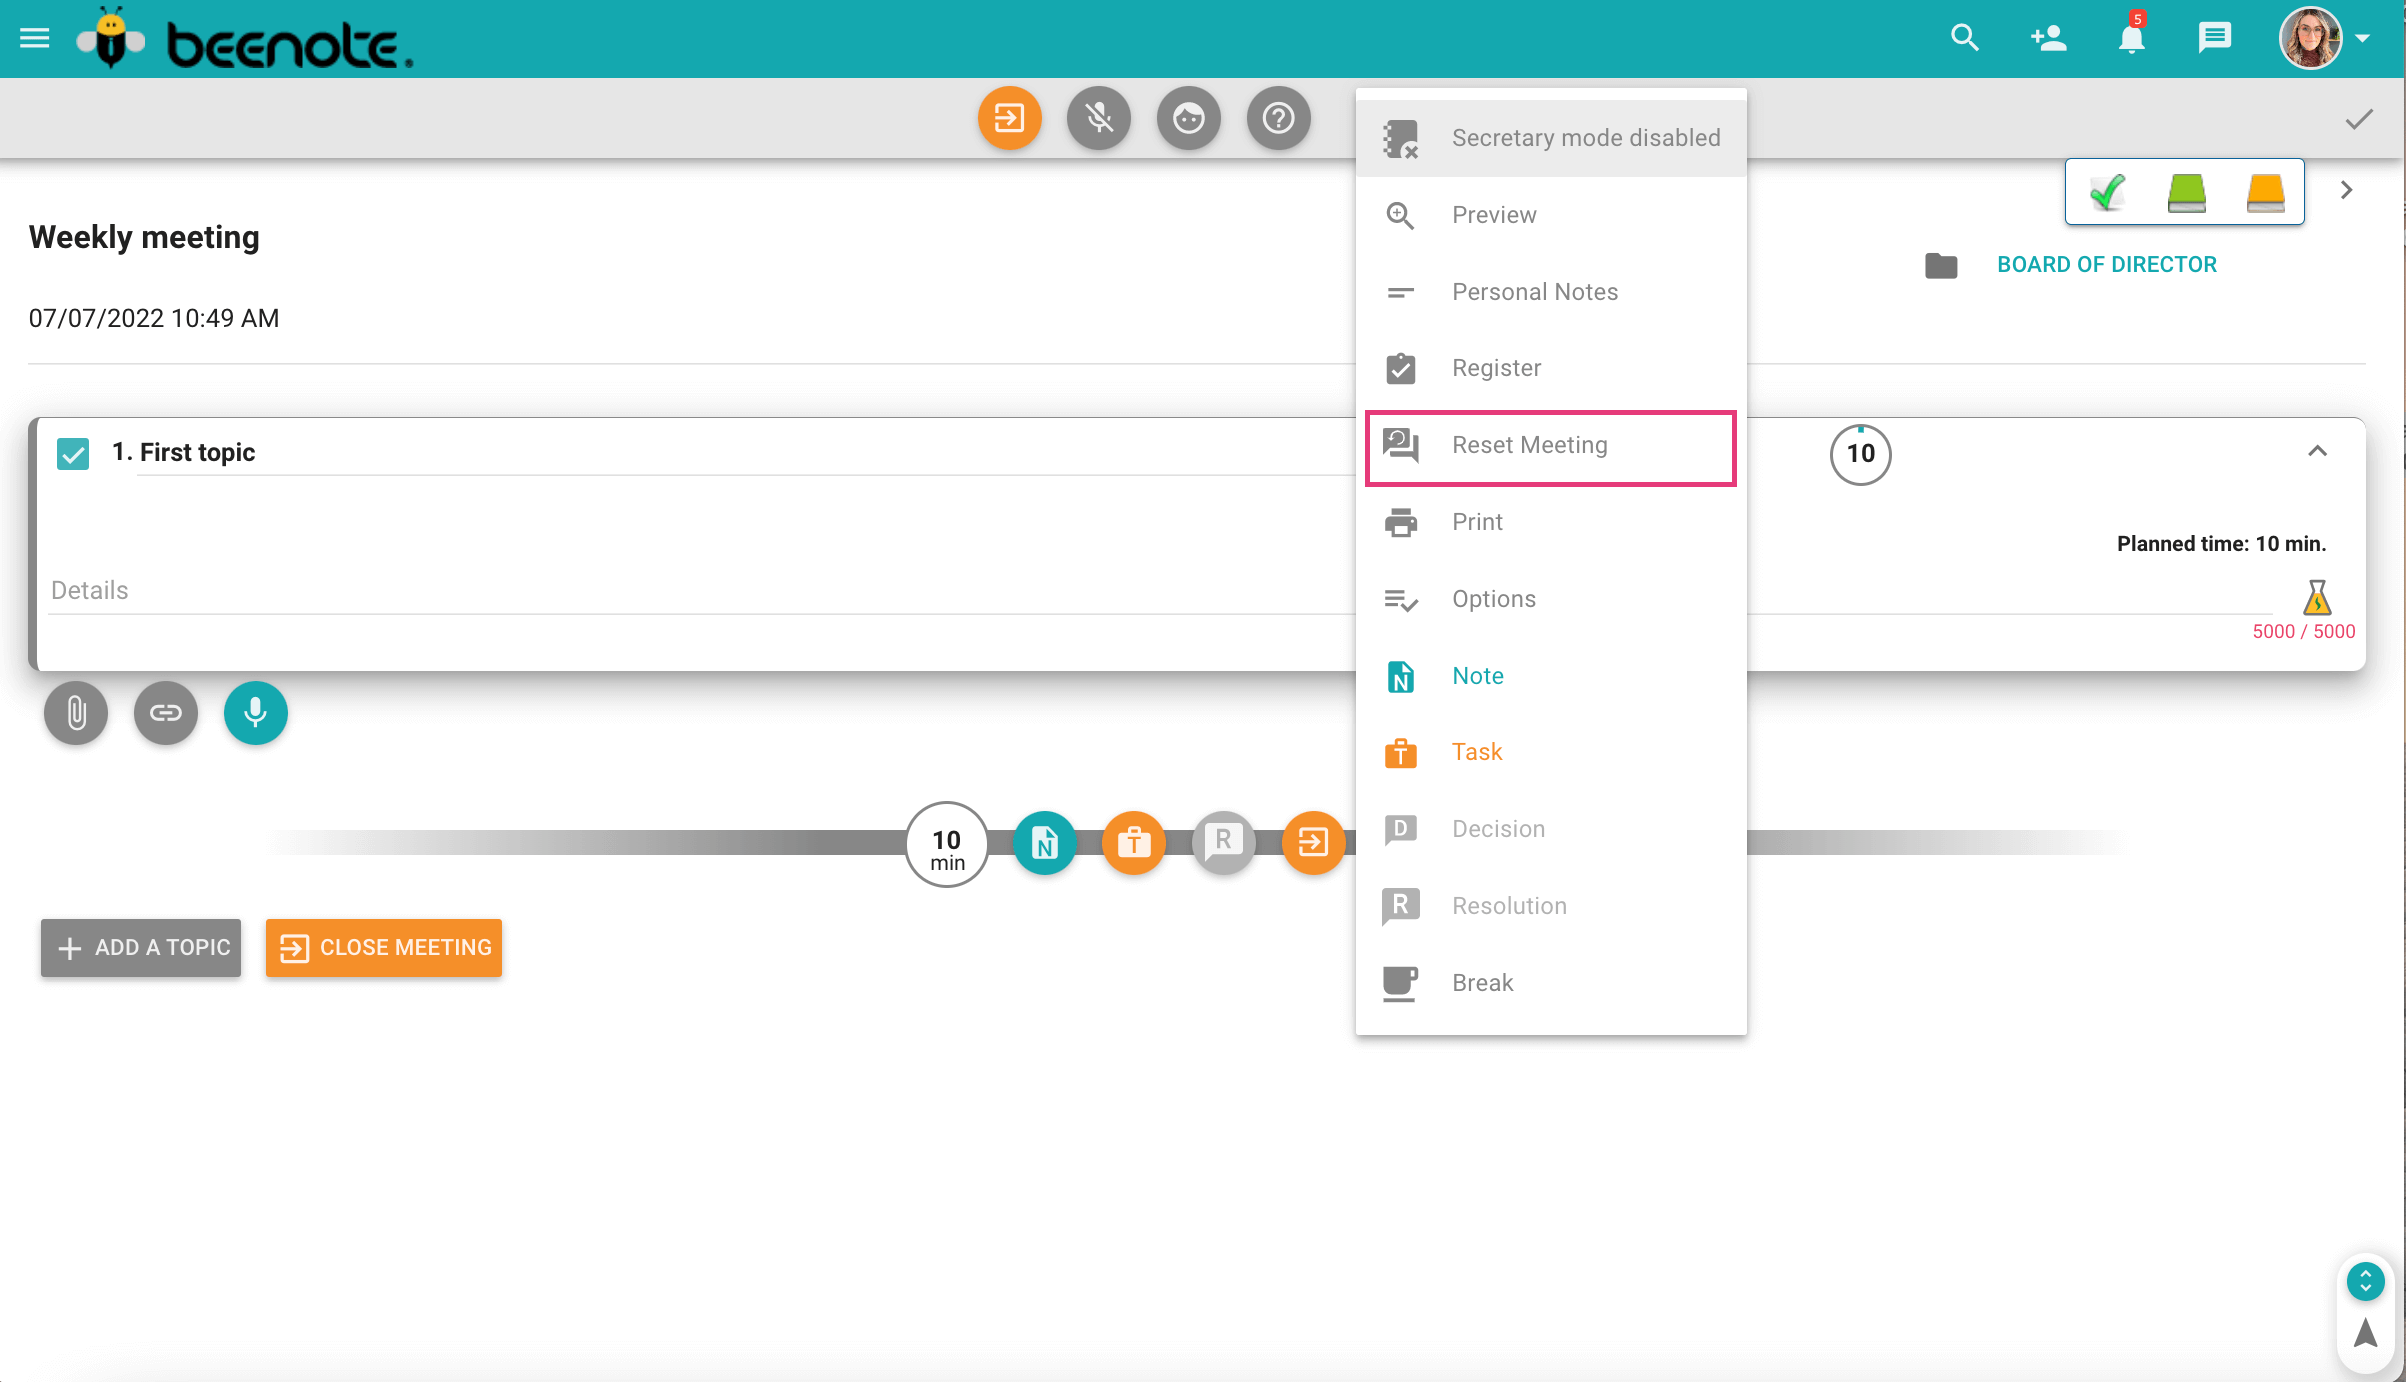
(6) The advanced functions of the drop-down menu:
- Manage secretary mode to make note-taking private (this icon will be present only if you use Beeboard)
- Preview your minutes in advance without leaving the meeting
- Take personal notes during the meeting
- Access the registers of your decisions, resolutions, tasks, and topics
- Reset the current meeting to restart it
- Print or save your minutes without ending the meeting
- Open advanced settings options for your minutes
- Add notes, tasks, decisions, resolutions or a break
(7) Finally, you can use other useful functions in the top bar:
The icon ![]() is used to enable or disable automatic audio recording.
is used to enable or disable automatic audio recording.
The icon ![]() is used for attendance management.
is used for attendance management.
The help button ![]() allows you to see the details of each button.
allows you to see the details of each button.
Close Meeting
Once all agenda items have been discussed, you can end the meeting.
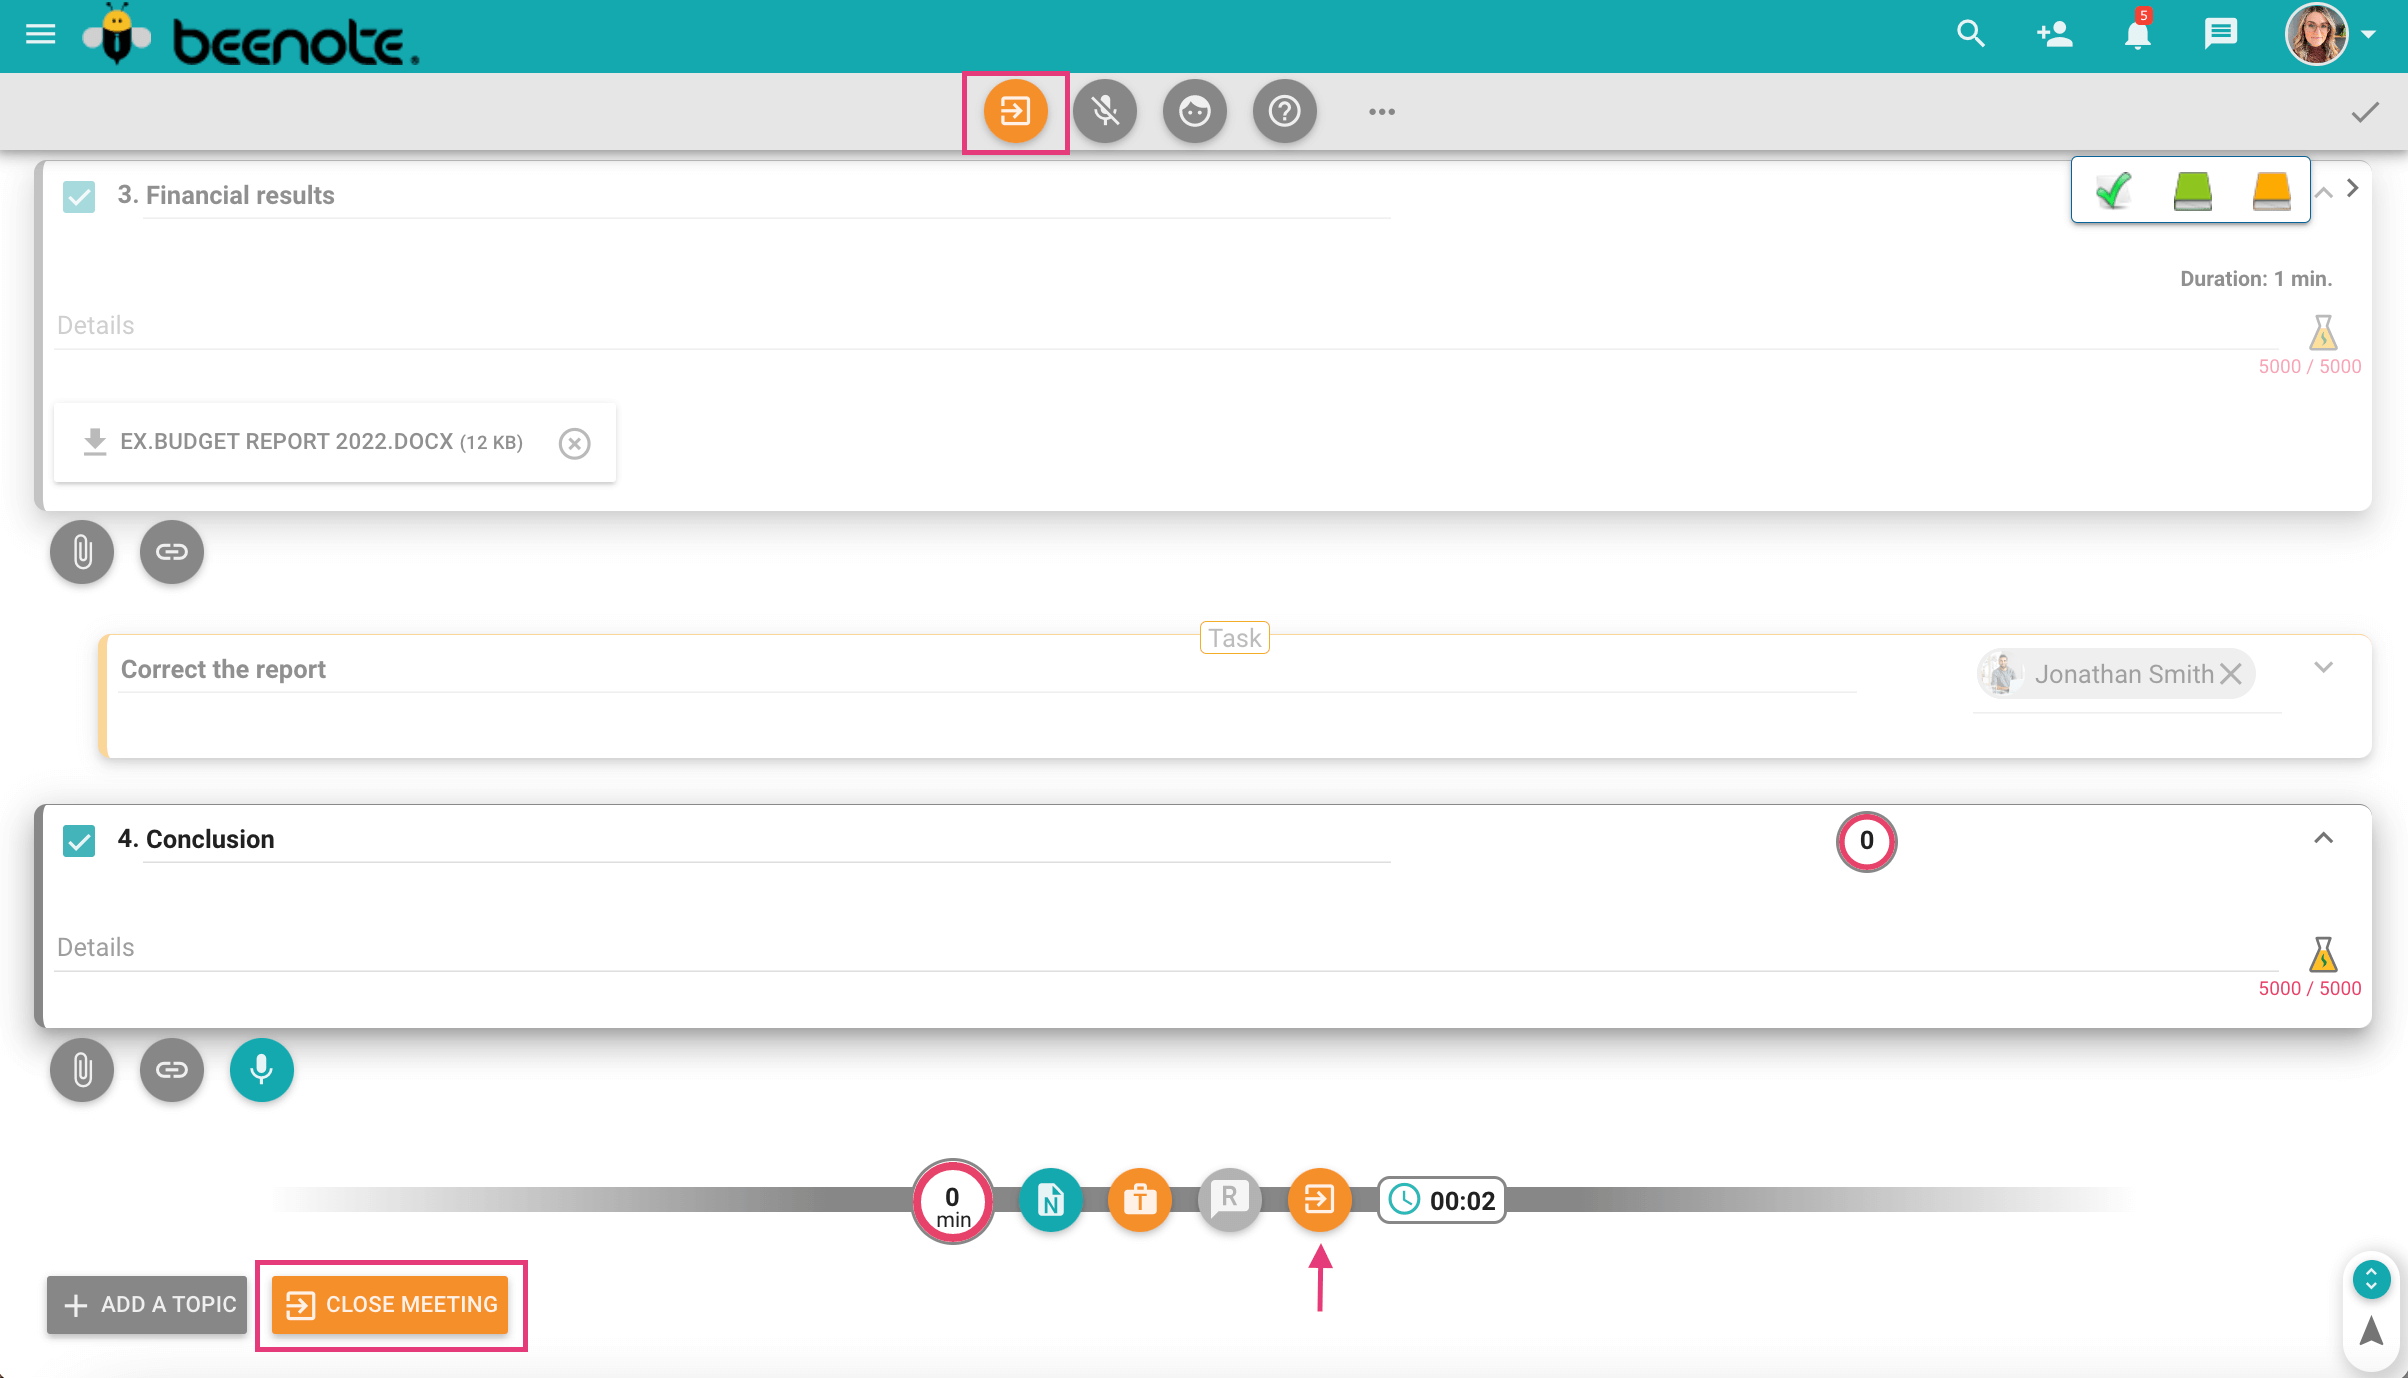
1. Click on icon ![]() in the options bar at the top of the page or on the bottom
in the options bar at the top of the page or on the bottom ![]() .
.
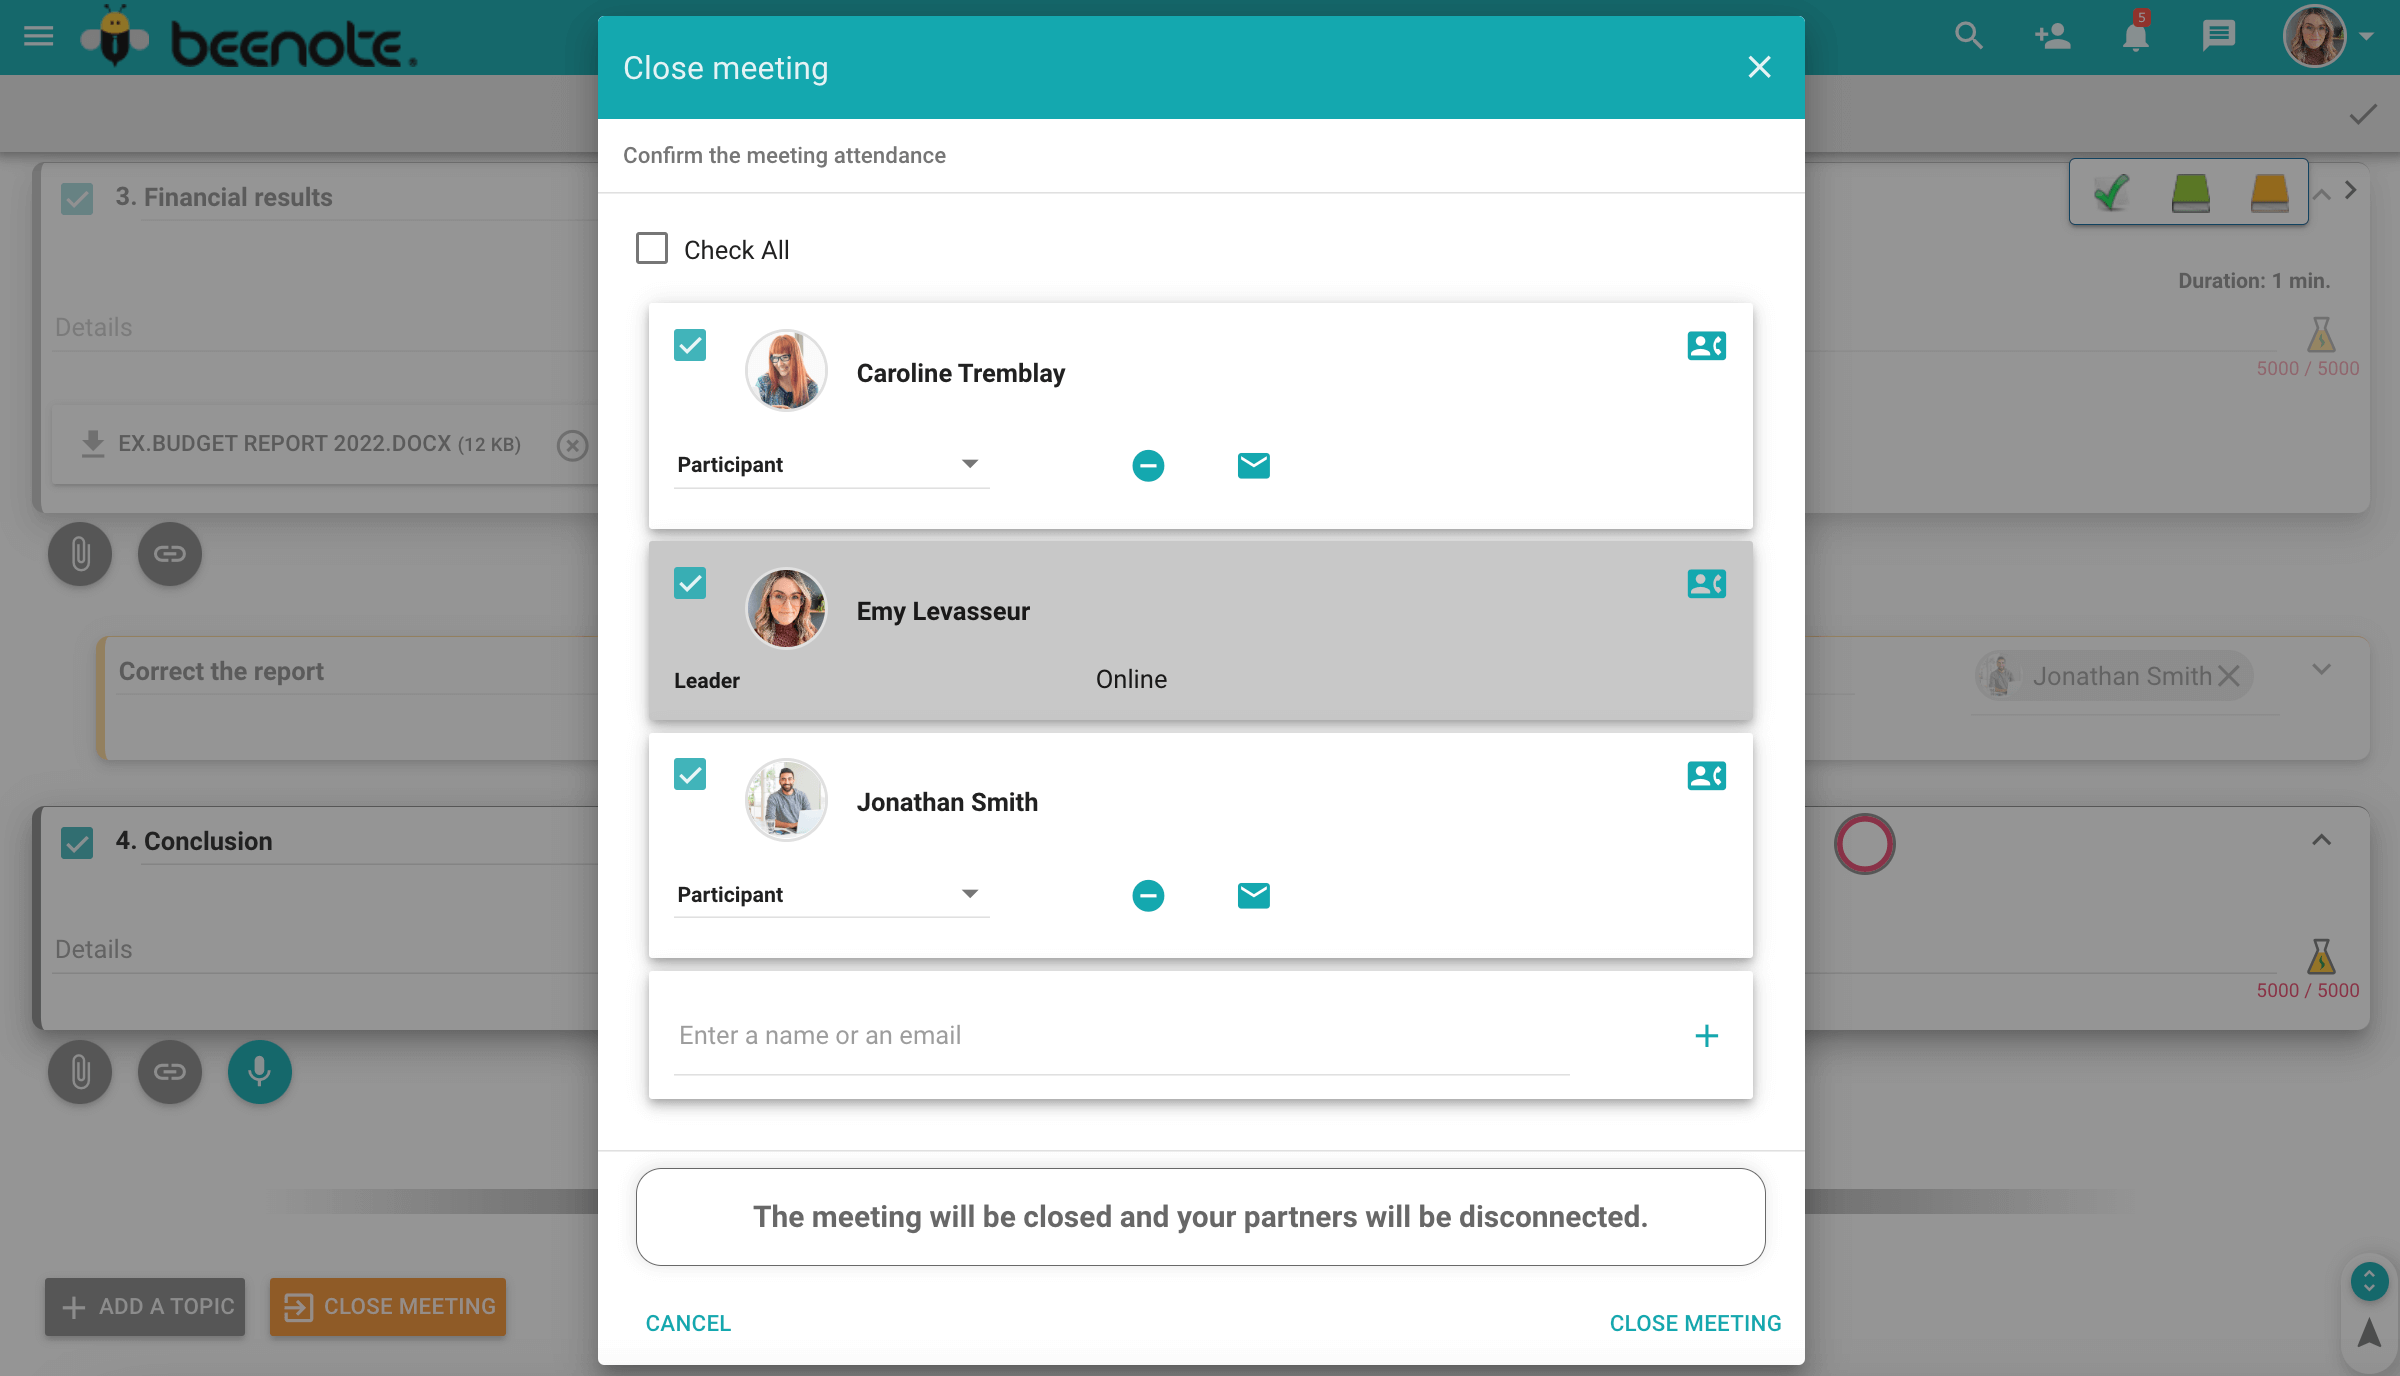
2. Next, a window will appear to take attendance.
It is possible to check off each person present individually or, if there are no absentees among the people who were invited to take part in the meeting, it is possible to check off everything with a single click.
3. The last step is to confirm your wish to end the meeting.
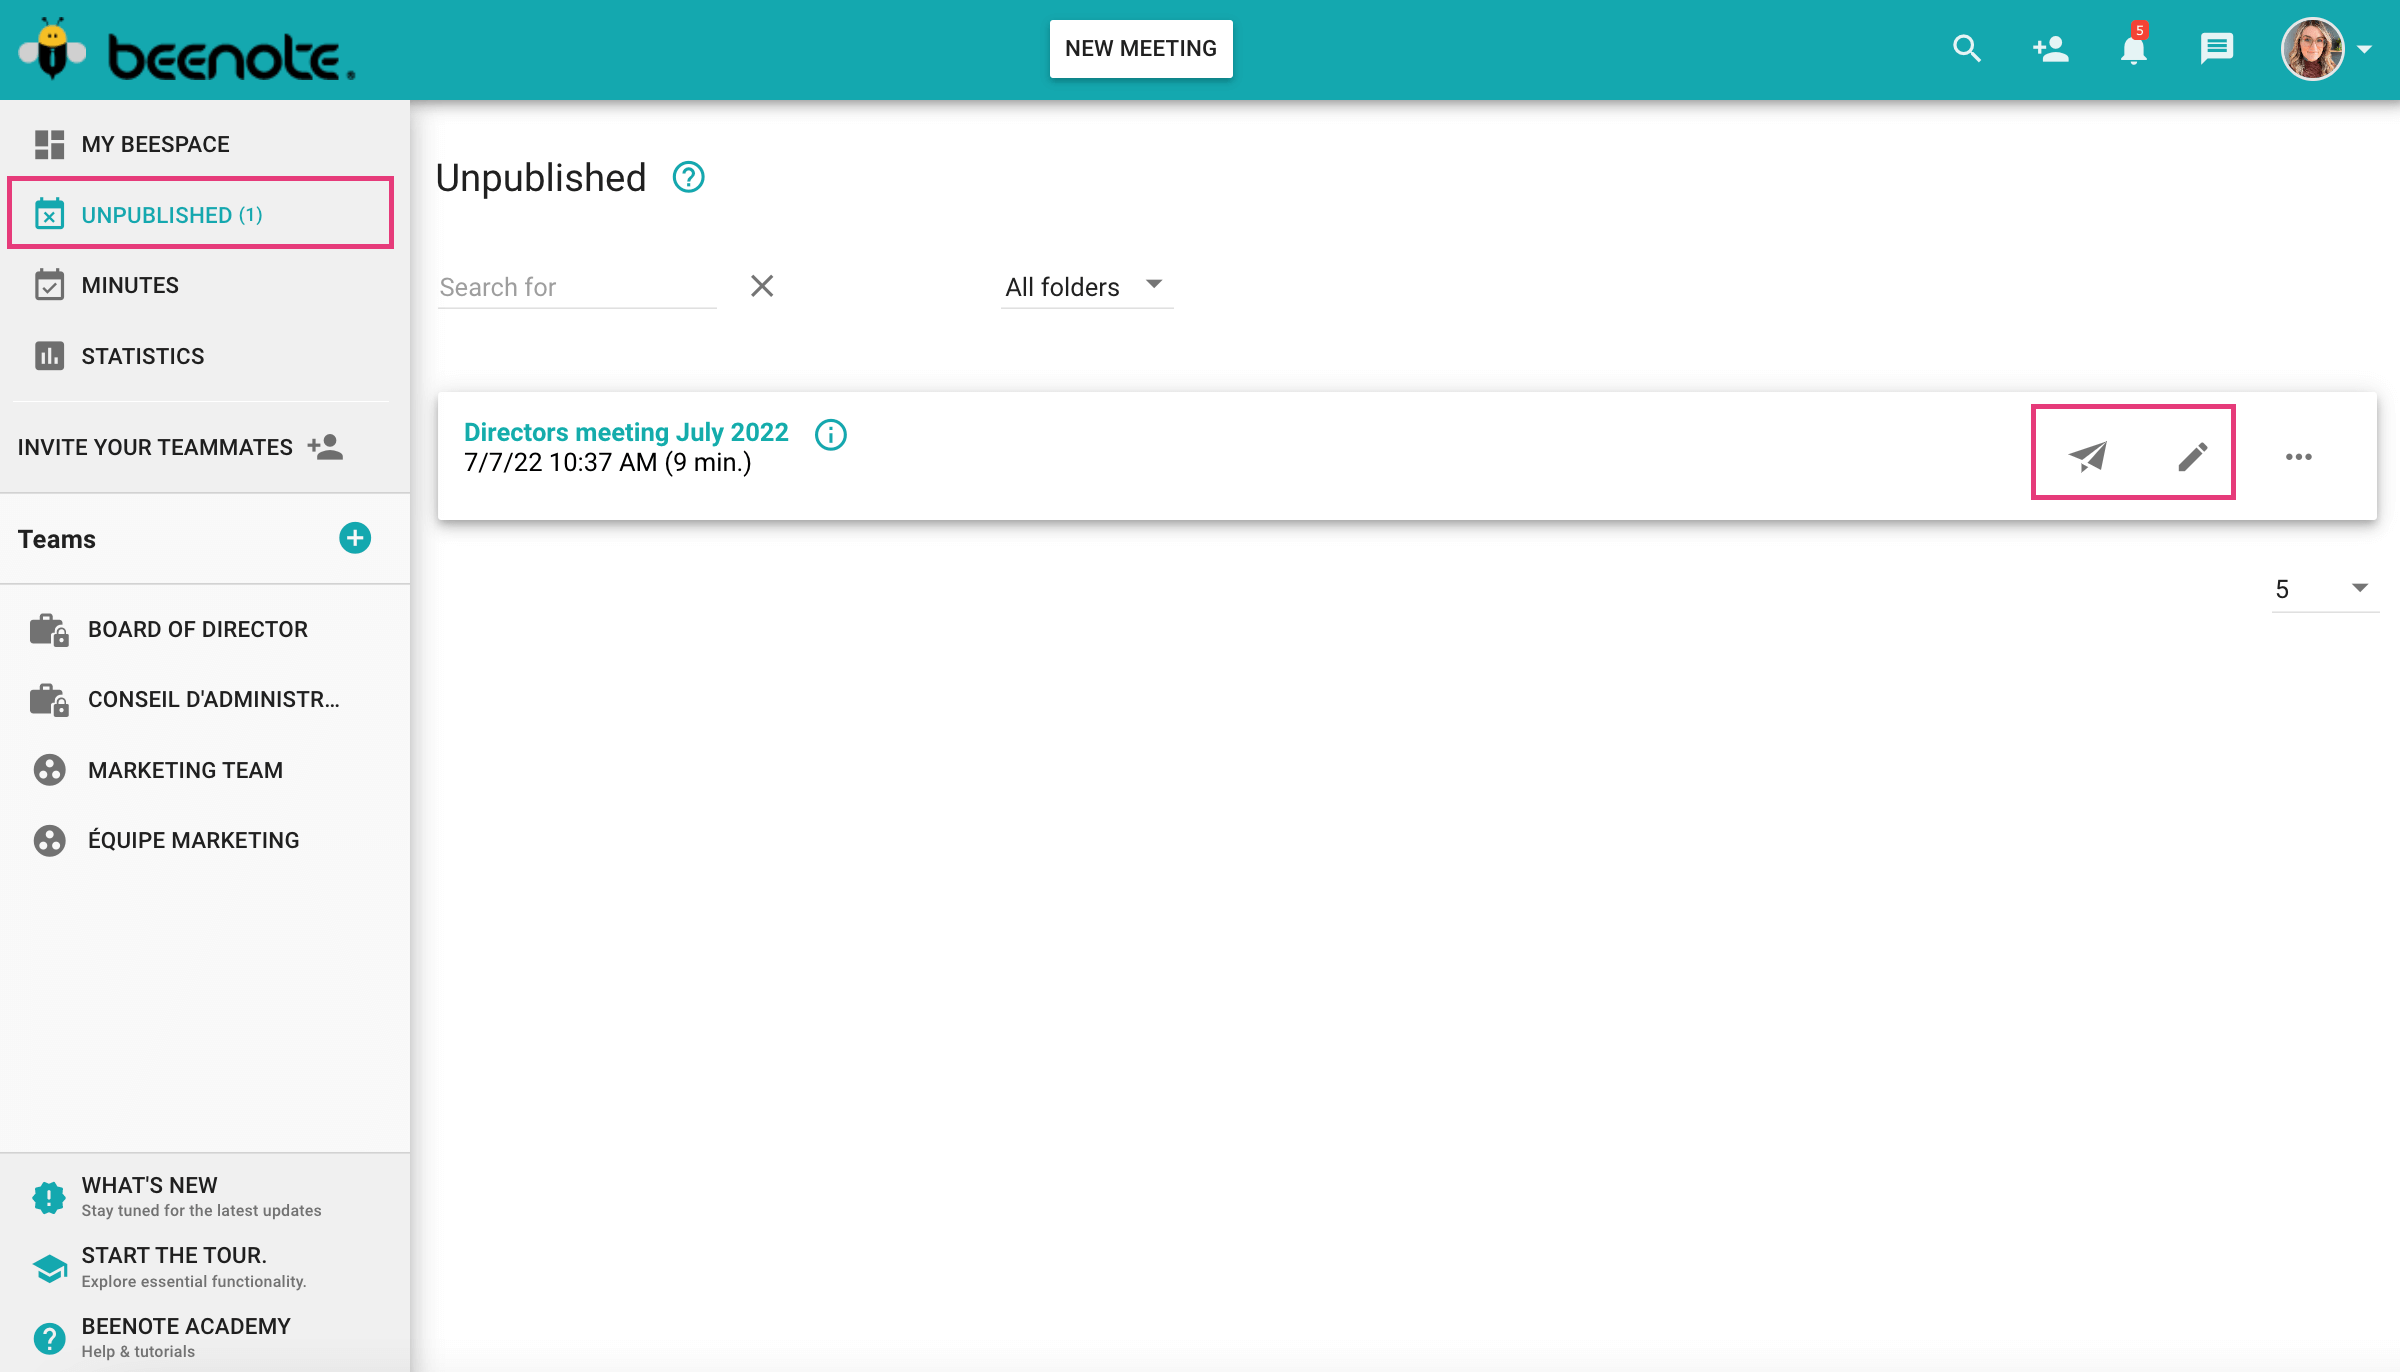
The minutes will be found in the Unpublished section also available in the left menu.
4. You can publish with one click ![]() or review the minutes
or review the minutes ![]() to edit it before publishing.
to edit it before publishing.
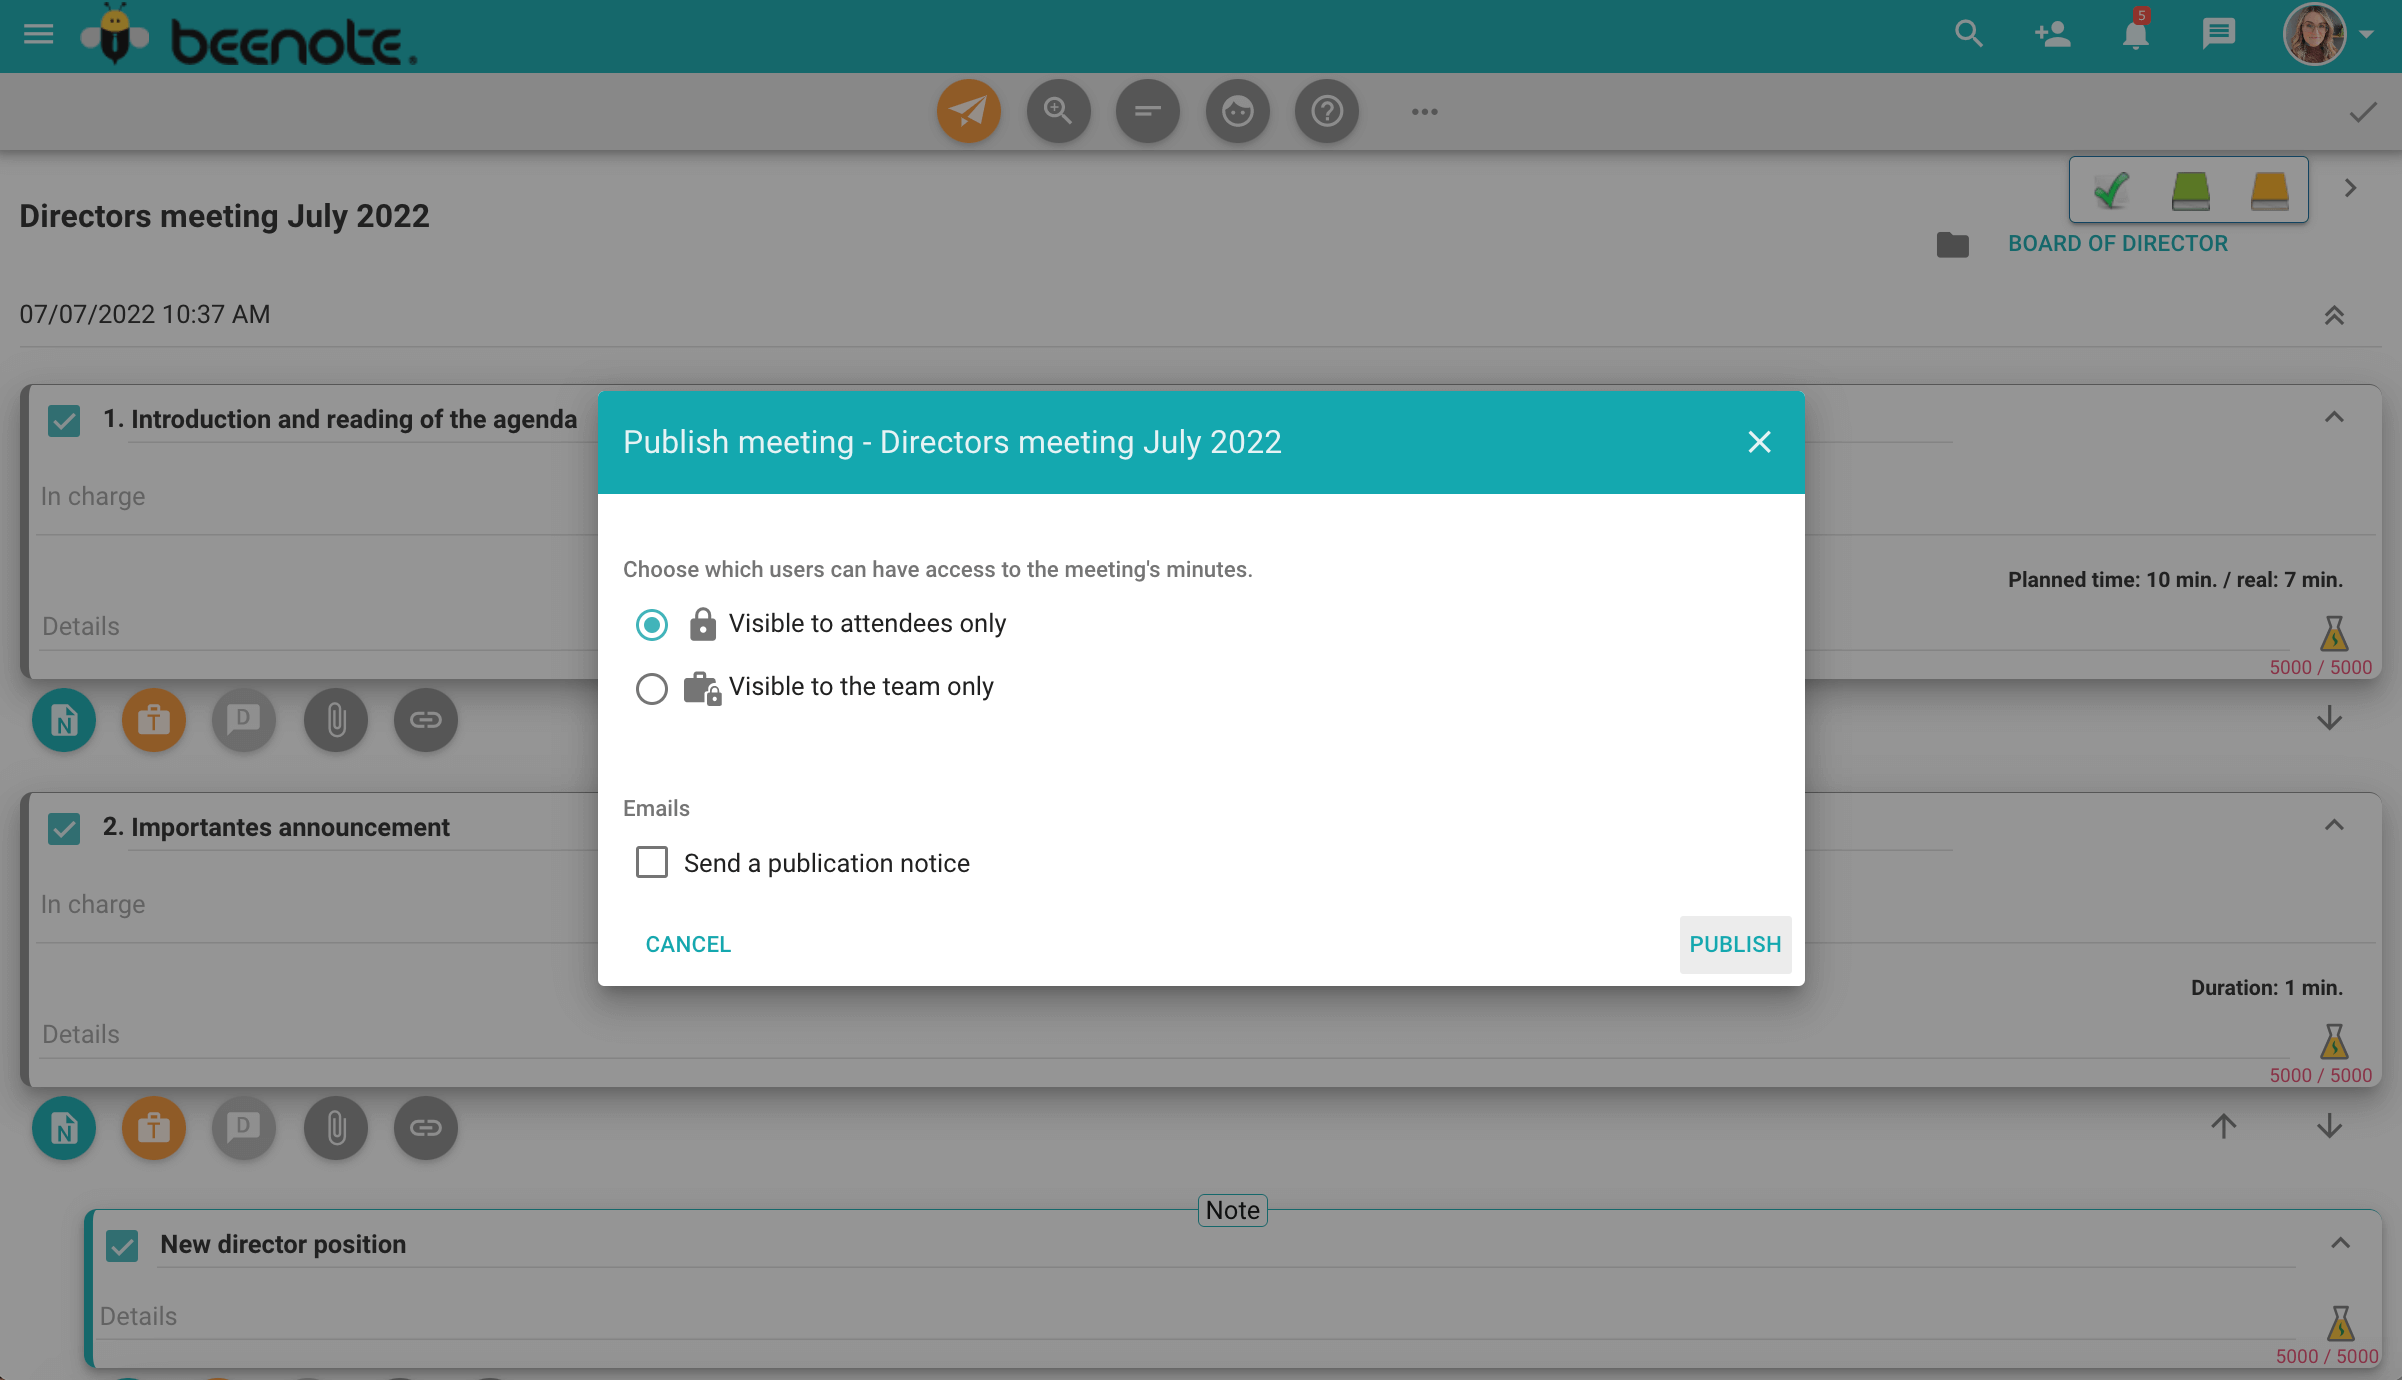
5. Confirm your choice with the new window that will appear. You can decide on confidentiality and send a notice of publication to the participants.
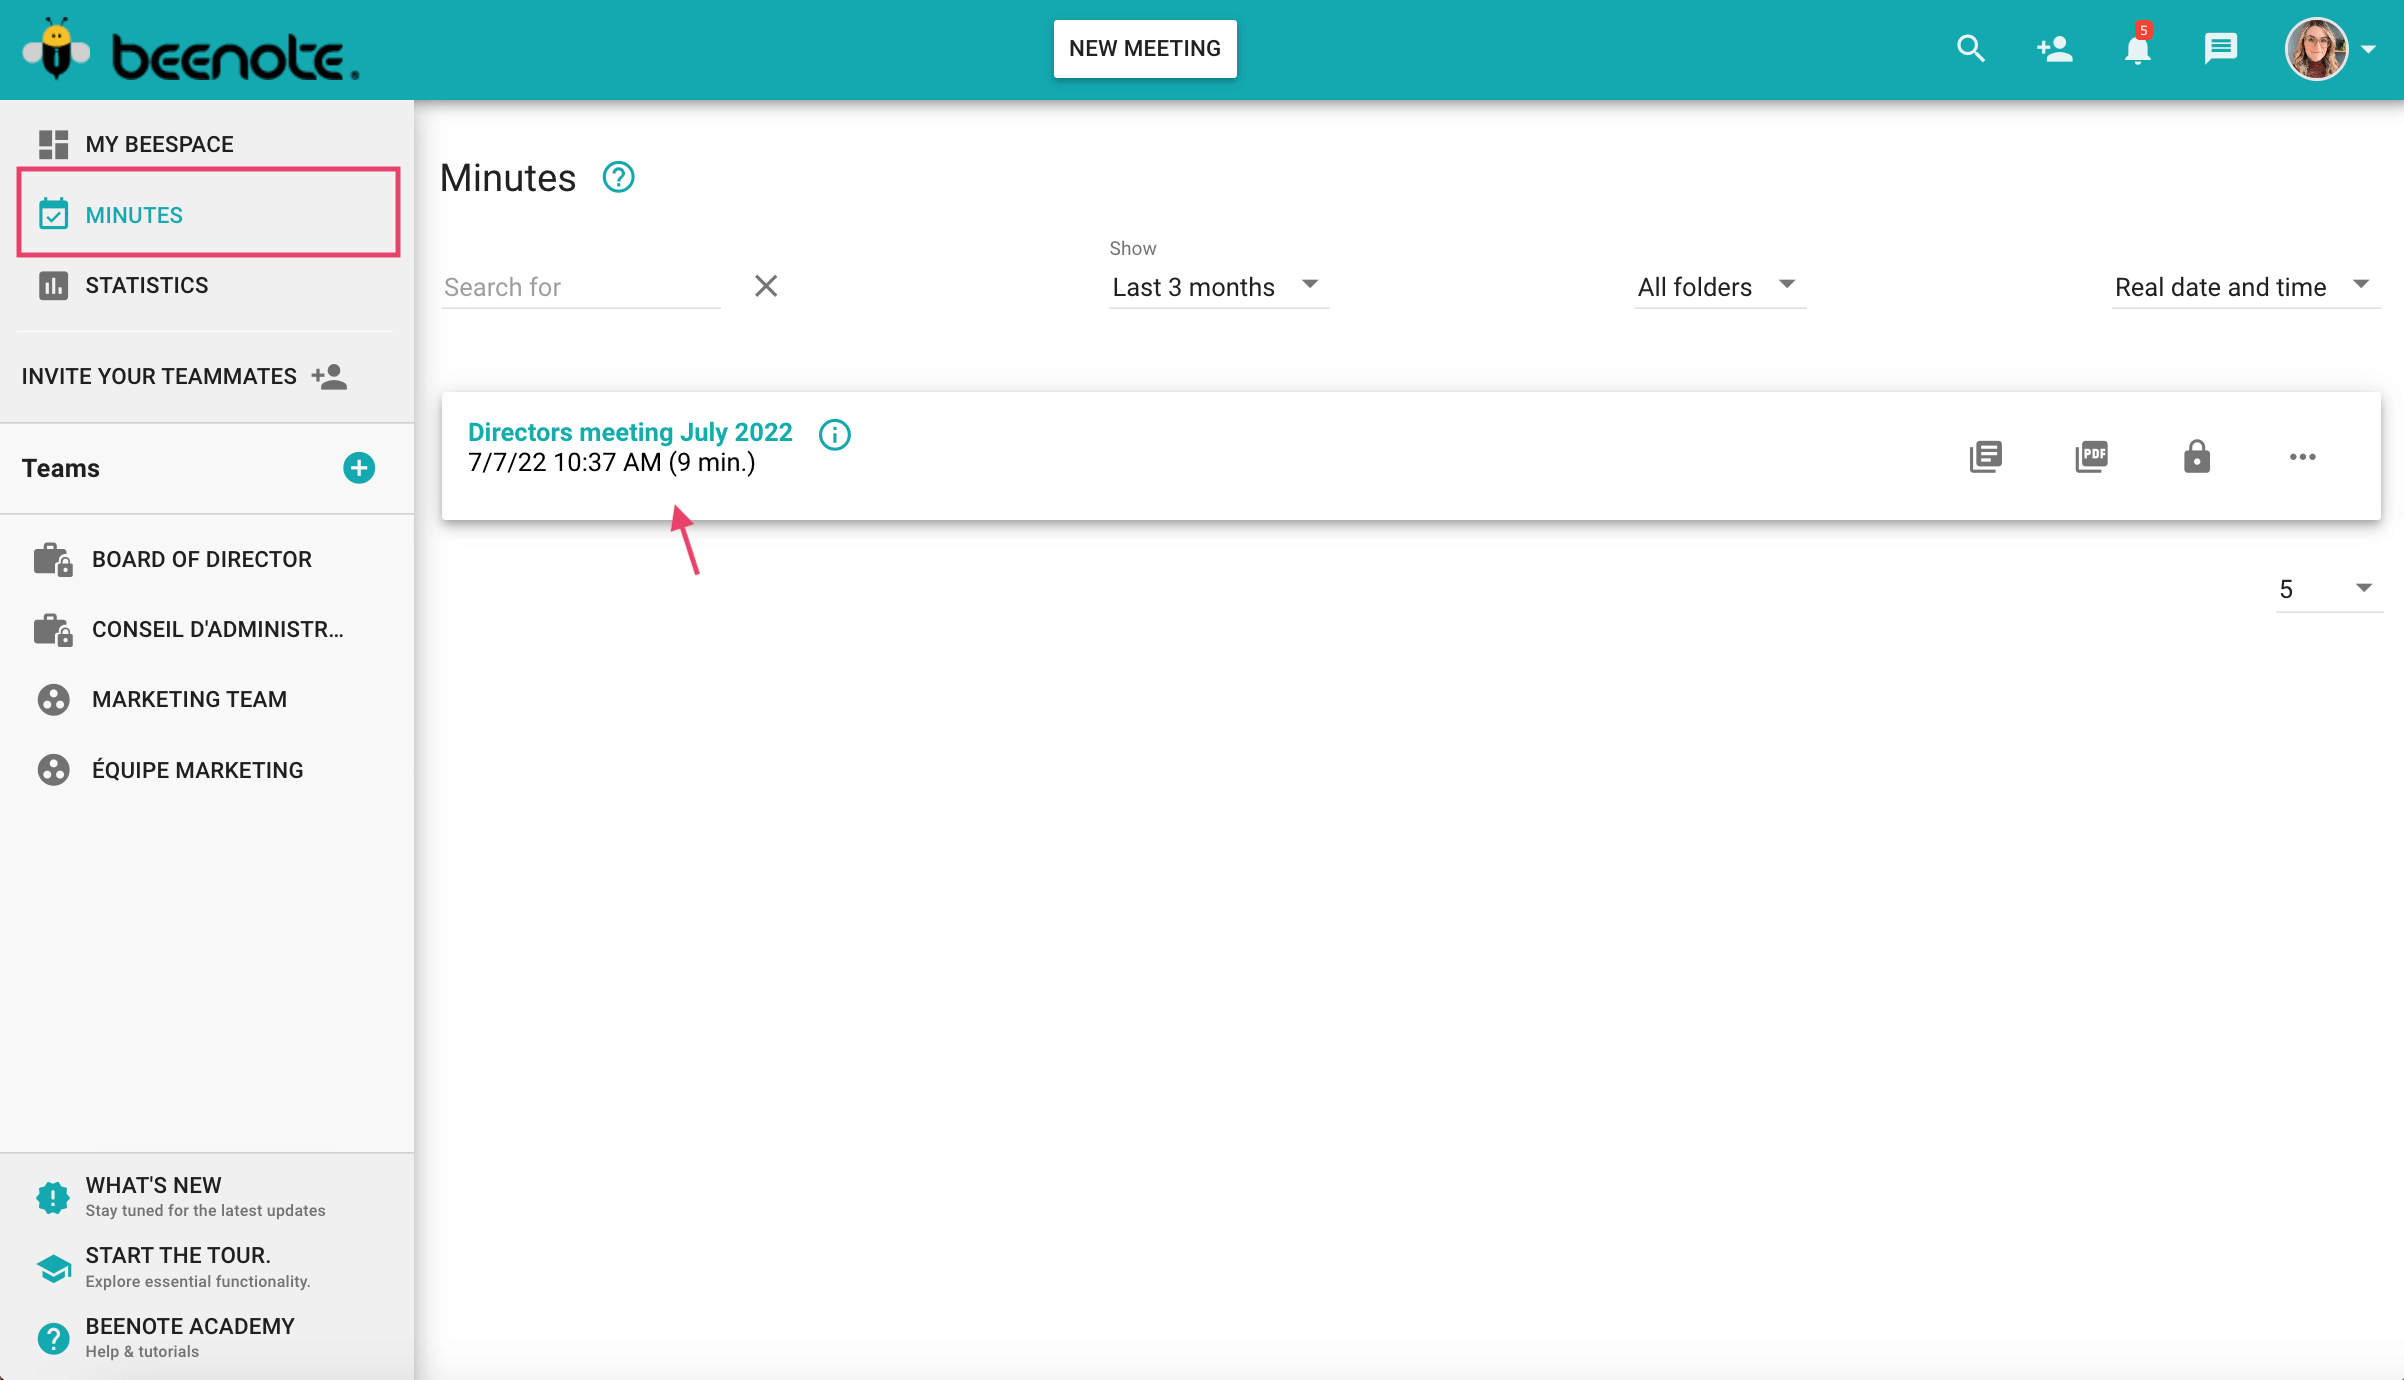
Finally, it will appear in the Minutes section available in the left menu of the application.
To learn more: Publish a report
Reset Meeting
To reset the meeting, locate and select the three small dots (…) at the top of the meeting window.
In the menu that appears, select Reset Meeting.
A second window will appear.
Select Reset Meeting again to confirm your choice.
This meeting will be back in your Beespace in My Meetings.
You can restart the meeting by selecting and starting it again or changing the date to move it.
![]() Next steps
Next steps
Attendance management: an important step in running your meetings
Assign tasks during the meeting: Assign personal tasks or tasks to your team members during the meeting
Take personal notes: Take notes during your meeting
Edit and publish minutes: After your meeting, publish your minutes in minutes

